
Tuning the Apollo Automation R-PRO 1
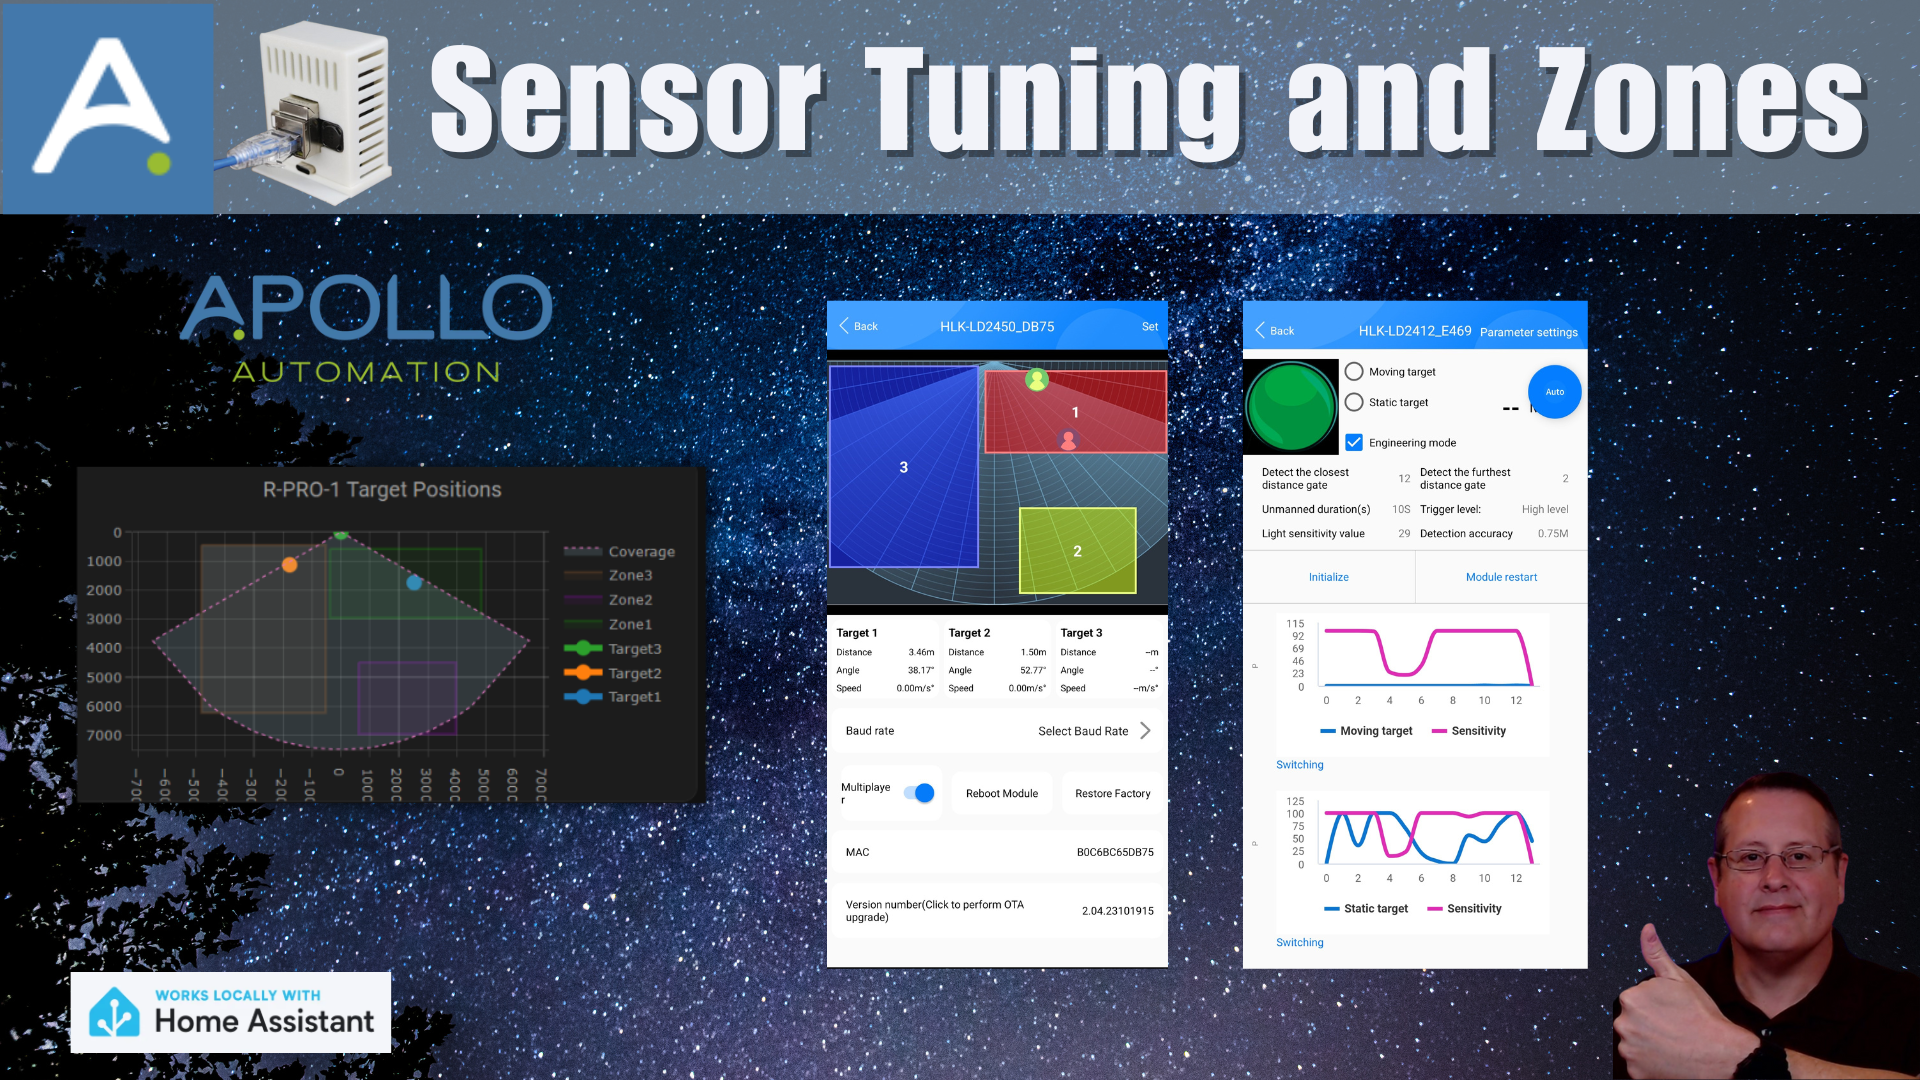
I recently (as of this writing) did a hardware video on the Apollo Automation R-PRO 1 PoE mmWave multisensor. I didn't spend any time on the tuning aspect of that device in that video as my plan was to create a separate posting/video for tuning.
I also created a related video for this blog post.
Tuning a radar based sensor will be very specific to the environment you use it in so I will go over the basics of how I tuned it for my environment.
The R-PRO 1 comes with an LD2450 multi-target sensor that can have up to 3 zones, which is plenty for my use case. I have had some comments that say 3 zones is not enough, but again the use cases for each person will be different. In addition to the LD2450, you can get an optional LD2412. The unit that I got from Apollo Automation (Thank you!) had both sensors included.
I should mention that there are 3 use cases for the R-PRO 1 as noted by Apollo Automation in their docs.
- Disabled: Disable multi-zone area detection and just tracks one big area.
- Detection: Only detects targets within each of the three zones.
- Filter: Excludes a zone from detection and detects presence everywhere else.
I am using the Detection mode but I could just as easily use the Disabled mode based on how I currently have the sensor set up.
HLK Radar Tool App Method
I will be using the HLK Radar Tool App to set the coordinates for each of the zones. You do not have to use the app, but it is highly recommended. If you don't use the app, you need to set your x and y coordinates for each zone manually, and in mm not inches.
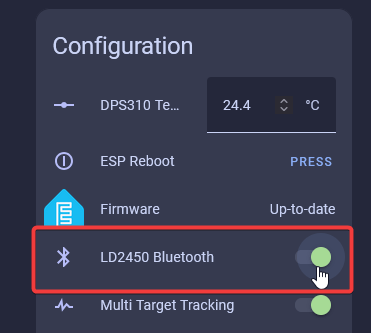
To use the app, install it on you device and make sure that Bluetooth is enabled for the LD2450 in the R-PRO-1.
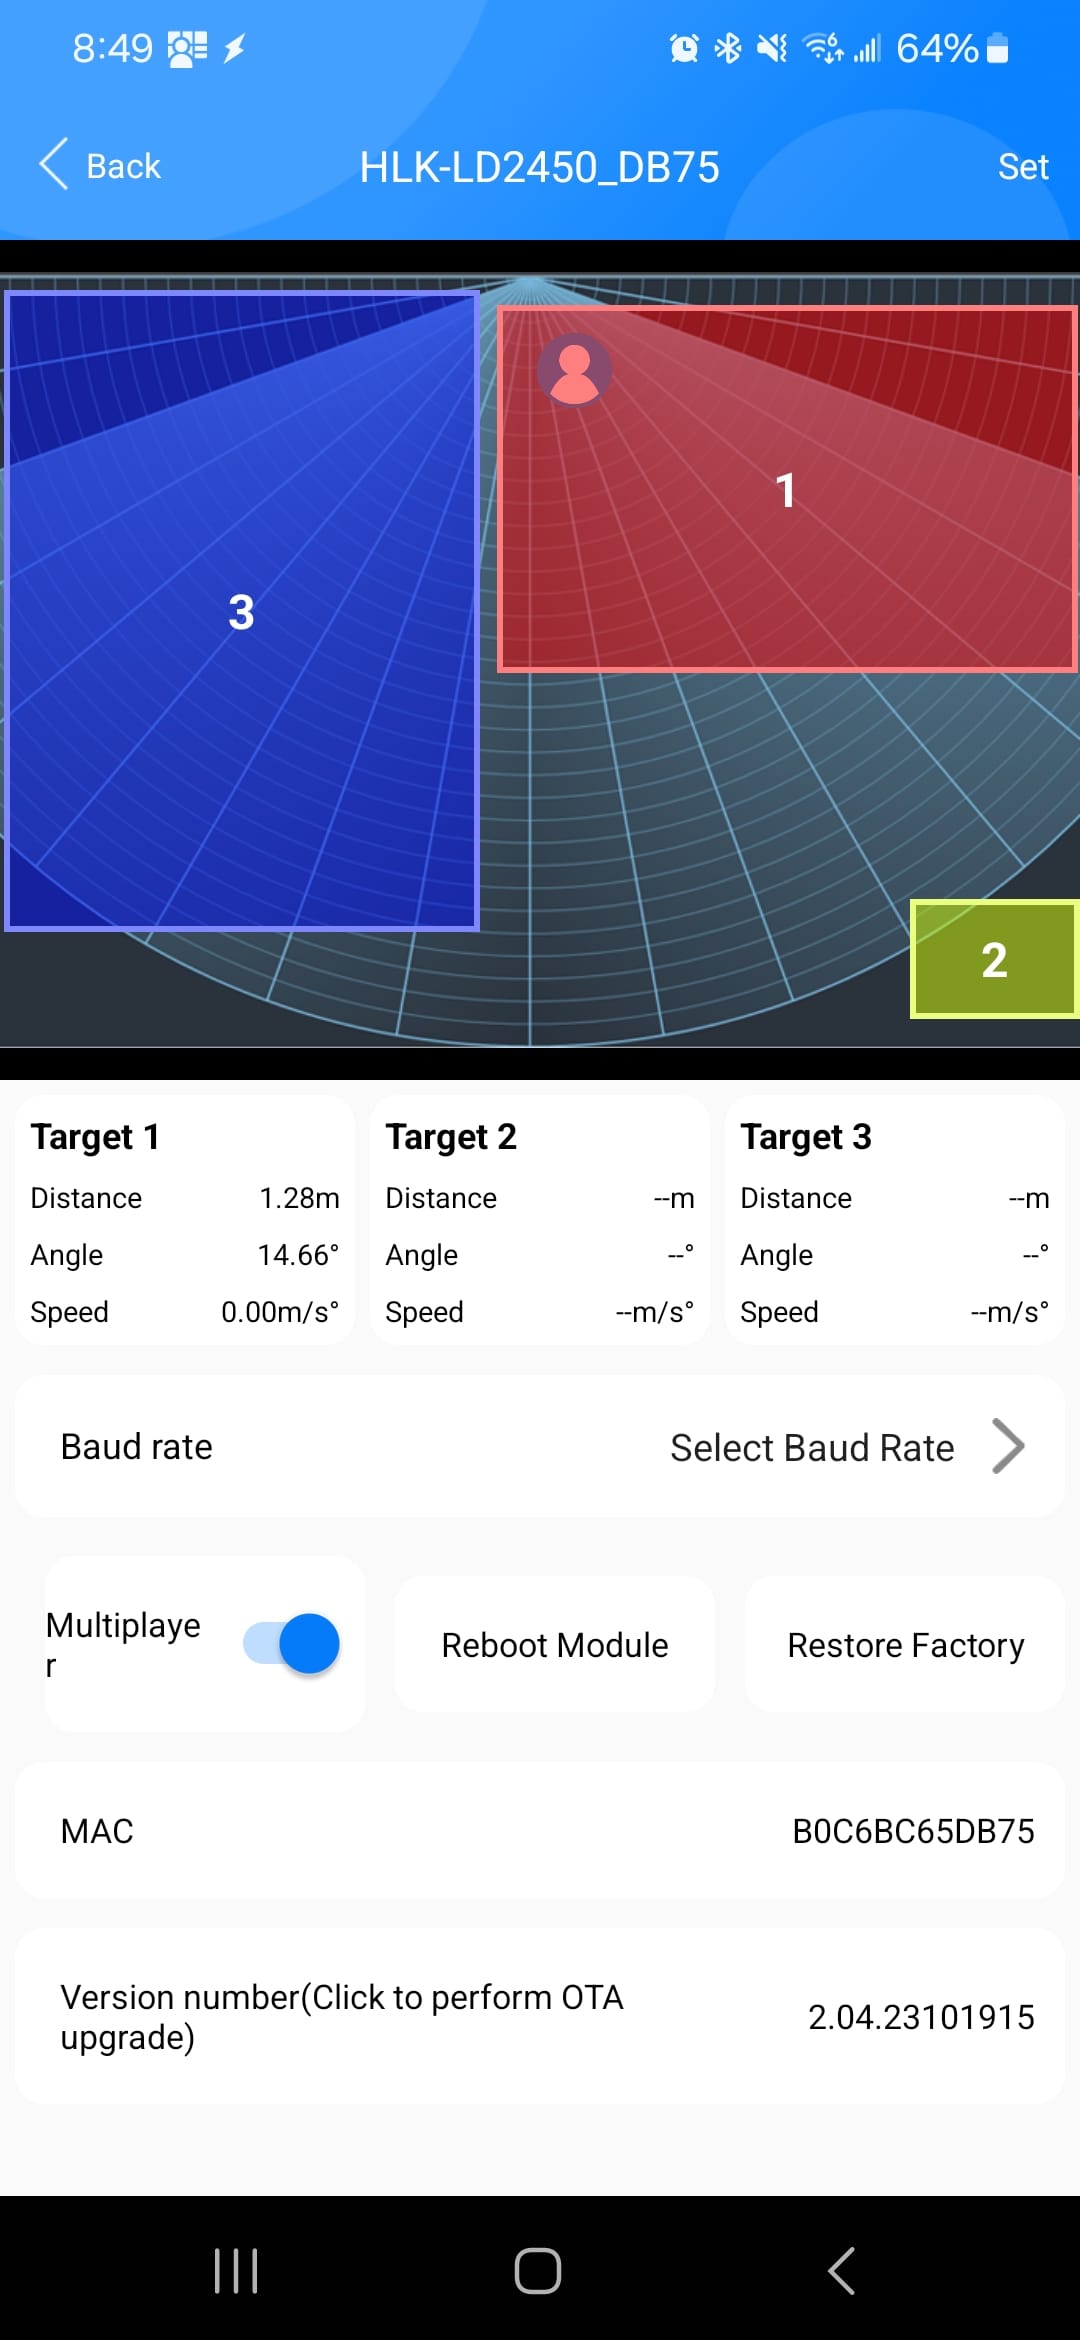
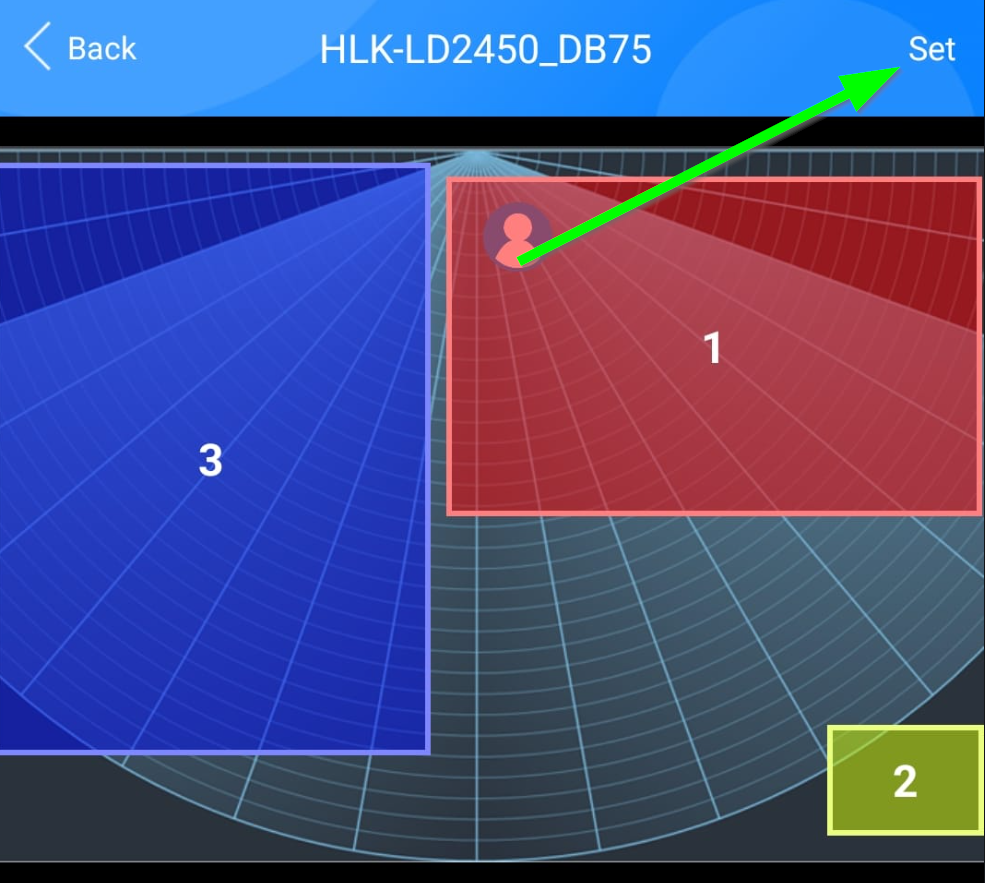
Connect to the LD2450 in the app by choosing it from the list and then click on "Set" in the top right part of the app.
After clicking set, you will be presented with a screen that allows you to change the size and location of each zone. Choose "Area Detection" below the map in order to get the 3 zones option.
Press and hold a zone to move it or click the edge of a zone to resize it. I am using zones 1 and 3 in the image above. Zone 2 is not currently used. I arbitrarily used zones 1 and 3. It doesn't matter what order of zones you use.
Once you have set your zones, click the Submit button and your zone coordinates will be stored in the device.

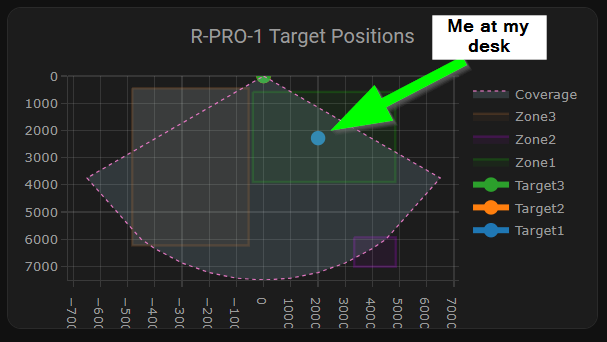
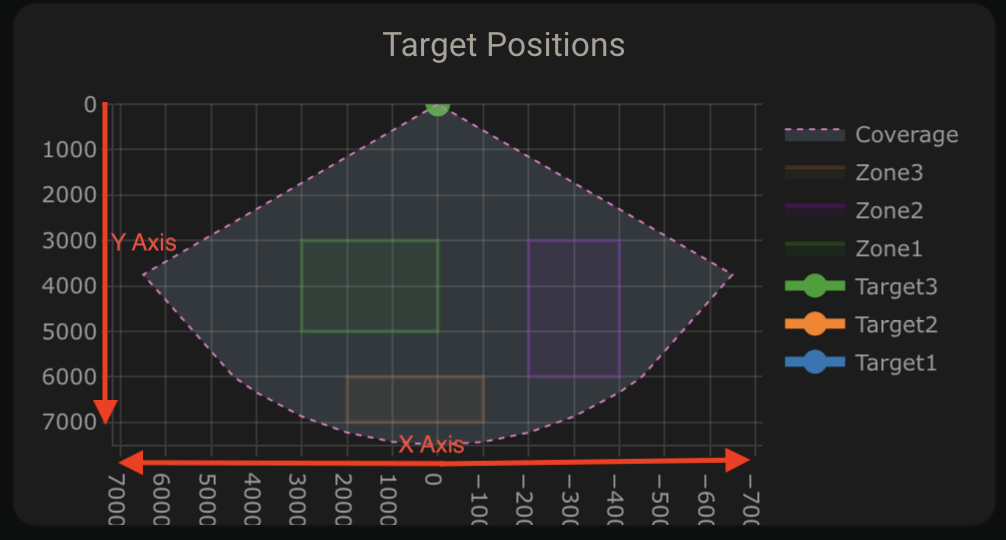
Since I am using Home Assistant, I am also going to use Plotly to create a radar card based on the R-PRO 1's zone settings. If you choose not to use the HLK Radar Tool, you can manually plot your x and y coordinates by using the view provided by this card.
This is a view of my zones in the Plotly card. When I submitted the zones via the HLK Radar Tool, they automatically got picked up by Home Assistant since I have the R-PRO 1 added to Home Assistant. You can see how I did that in the overview video. The R-PRO 1 was detected by Home Assistant automatically and I just added it.
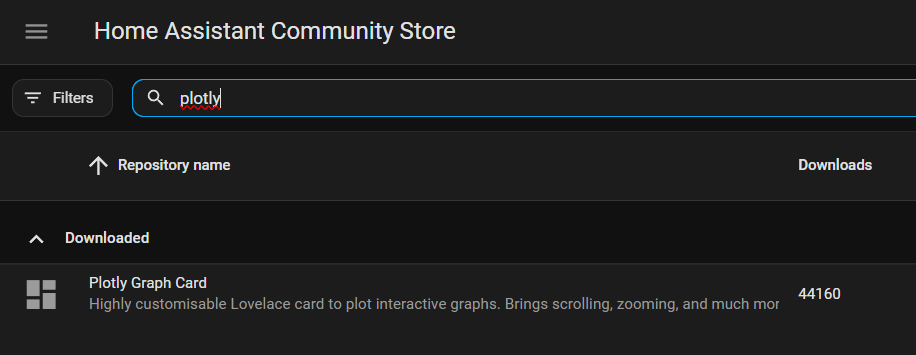
Adding the Plotly card requires installing Plotly into Home Assistant via HACS. This is done by searching for Plotly in HACS and installing it like any other HACS item.
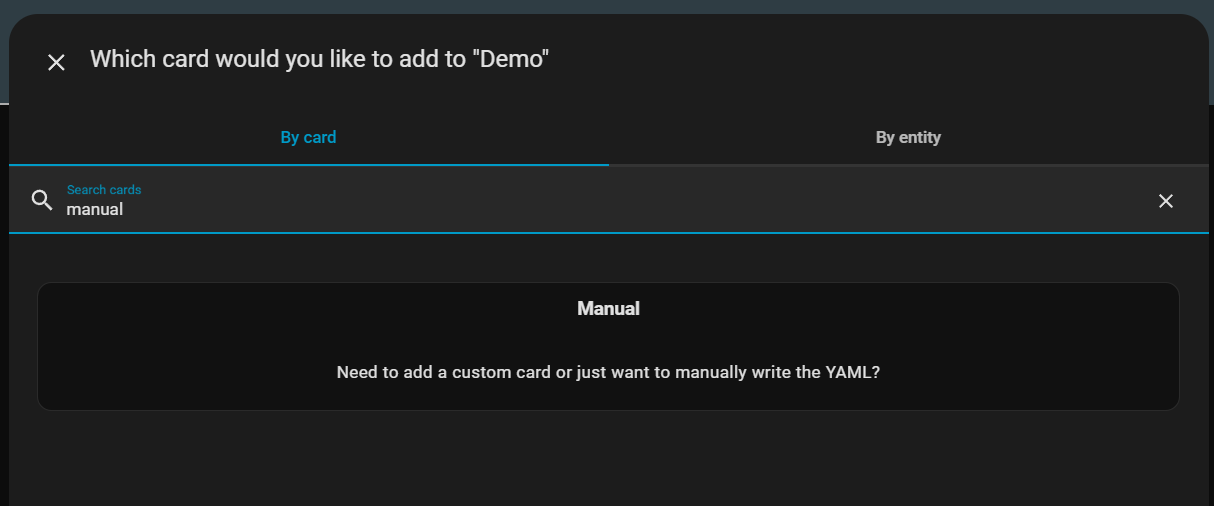
Apollo Automation has a Plotly YAML generator tool that will allow you to create a complete card simply by inputting your device name as it appears in Home Assistant and optionally specifying the zone names. It will output something similar to that below (change {your_device_name} to the name of your R-PRO 1) and paste this code into a new card on your dashboard using the manual card option.
type: custom:plotly-graph
title: R-PRO-1 Target Positions
refresh_interval: 1
hours_to_show: current_day
layout:
  height: 230
  margin:
    l: 50
    r: 20
    t: 20
    b: 40
  showlegend: true
  xaxis:
    dtick: 1000
    gridcolor: RGBA(200,200,200,0.15)
    zerolinecolor: RGBA(200,200,200,0.15)
    type: number
    fixedrange: true
    range:
      - -4000
      - 4000
  yaxis:
    dtick: 1000
    gridcolor: RGBA(200,200,200,0.15)
    zerolinecolor: RGBA(200,200,200,0.15)
    scaleanchor: x
    scaleratio: 1
    fixedrange: true
    range:
      - 7500
      - 0
entities:
  - entity: ''
    name: Target1
    marker:
      size: 12
    line:
      shape: spline
      width: 5
    x:
      - $ex hass.states["sensor.your_device_name_ld2450_target_1_x"].state
    'y':
      - $ex hass.states["sensor.your_device_name_ld2450_target_1_y"].state
  - entity: ''
    name: Target2
    marker:
      size: 12
    line:
      shape: spline
      width: 5
    x:
      - $ex hass.states["sensor.your_device_name_ld2450_target_2_x"].state
    'y':
      - $ex hass.states["sensor.your_device_name_ld2450_target_2_y"].state
  - entity: ''
    name: Target3
    marker:
      size: 12
    line:
      shape: spline
      width: 5
    x:
      - $ex hass.states["sensor.your_device_name_ld2450_target_3_x"].state
    'y':
      - $ex hass.states["sensor.your_device_name_ld2450_target_3_y"].state
  - entity: ''
    name: "Zone1"
    mode: lines
    fill: toself
    fillcolor: RGBA(20,200,0,0.06)
    line:
      color: RGBA(20,200,0,0.2)
      shape: line
      width: 2
    x:
      - $ex hass.states["number.your_device_name_ld2450_zone_1_x1"].state
      - $ex hass.states["number.your_device_name_ld2450_zone_1_x1"].state
      - $ex hass.states["number.your_device_name_ld2450_zone_1_x2"].state
      - $ex hass.states["number.your_device_name_ld2450_zone_1_x2"].state
      - $ex hass.states["number.your_device_name_ld2450_zone_1_x1"].state
    'y':
      - $ex hass.states["number.your_device_name_ld2450_zone_1_y1"].state
      - $ex hass.states["number.your_device_name_ld2450_zone_1_y2"].state
      - $ex hass.states["number.your_device_name_ld2450_zone_1_y2"].state
      - $ex hass.states["number.your_device_name_ld2450_zone_1_y1"].state
      - $ex hass.states["number.your_device_name_ld2450_zone_1_y1"].state
  - entity: ''
    name: "Zone2"
    mode: lines
    fill: toself
    fillcolor: RGBA(200,0,255,0.06)
    line:
      color: RGBA(200,0,255,0.2)
      shape: line
      width: 2
    x:
      - $ex hass.states["number.your_device_name_ld2450_zone_2_x1"].state
      - $ex hass.states["number.your_device_name_ld2450_zone_2_x1"].state
      - $ex hass.states["number.your_device_name_ld2450_zone_2_x2"].state
      - $ex hass.states["number.your_device_name_ld2450_zone_2_x2"].state
      - $ex hass.states["number.your_device_name_ld2450_zone_2_x1"].state
    'y':
      - $ex hass.states["number.your_device_name_ld2450_zone_2_y1"].state
      - $ex hass.states["number.your_device_name_ld2450_zone_2_y2"].state
      - $ex hass.states["number.your_device_name_ld2450_zone_2_y2"].state
      - $ex hass.states["number.your_device_name_ld2450_zone_2_y1"].state
      - $ex hass.states["number.your_device_name_ld2450_zone_2_y1"].state
  - entity: ''
    name: "Zone3"
    mode: lines
    fill: toself
    fillcolor: RGBA(200,120,55,0.06)
    line:
      color: RGBA(200,120,55,0.2)
      shape: line
      width: 2
    x:
      - $ex hass.states["number.your_device_name_ld2450_zone_3_x1"].state
      - $ex hass.states["number.your_device_name_ld2450_zone_3_x1"].state
      - $ex hass.states["number.your_device_name_ld2450_zone_3_x2"].state
      - $ex hass.states["number.your_device_name_ld2450_zone_3_x2"].state
      - $ex hass.states["number.your_device_name_ld2450_zone_3_x1"].state
    'y':
      - $ex hass.states["number.your_device_name_ld2450_zone_3_y1"].state
      - $ex hass.states["number.your_device_name_ld2450_zone_3_y2"].state
      - $ex hass.states["number.your_device_name_ld2450_zone_3_y2"].state
      - $ex hass.states["number.your_device_name_ld2450_zone_3_y1"].state
      - $ex hass.states["number.your_device_name_ld2450_zone_3_y1"].state
  - entity: ''
    name: Coverage
    mode: lines
    fill: tonexty
    fillcolor: rgba(168, 216, 234, 0.15)
    line:
      shape: line
      width: 1
      dash: dot
    x:
      - 0
      - $ex 7500 * Math.sin((2 * Math.PI)/360 * 60)
      - 4500
      - 4000
      - 3000
      - 2000
      - 1000
      - 0
      - -1000
      - -2000
      - -3000
      - -4000
      - -4500
      - $ex -7500 * Math.sin((2 * Math.PI)/360 * 60)
      - 0
    'y':
      - 0
      - $ex 7500 * Math.cos((2 * Math.PI)/360 * 60)
      - $ex Math.sqrt( 7500**2 - 4500**2 )
      - $ex Math.sqrt( 7500**2 - 4000**2 )
      - $ex Math.sqrt( 7500**2 - 3000**2 )
      - $ex Math.sqrt( 7500**2 - 2000**2 )
      - $ex Math.sqrt( 7500**2 - 1000**2 )
      - 7500
      - $ex Math.sqrt( 7500**2 - 1000**2 )
      - $ex Math.sqrt( 7500**2 - 2000**2 )
      - $ex Math.sqrt( 7500**2 - 3000**2 )
      - $ex Math.sqrt( 7500**2 - 4000**2 )
      - $ex Math.sqrt( 7500**2 - 4500**2 )
      - $ex 7500 * Math.cos((2 * Math.PI)/360 * 60)
      - 0
raw_plotly_config: true
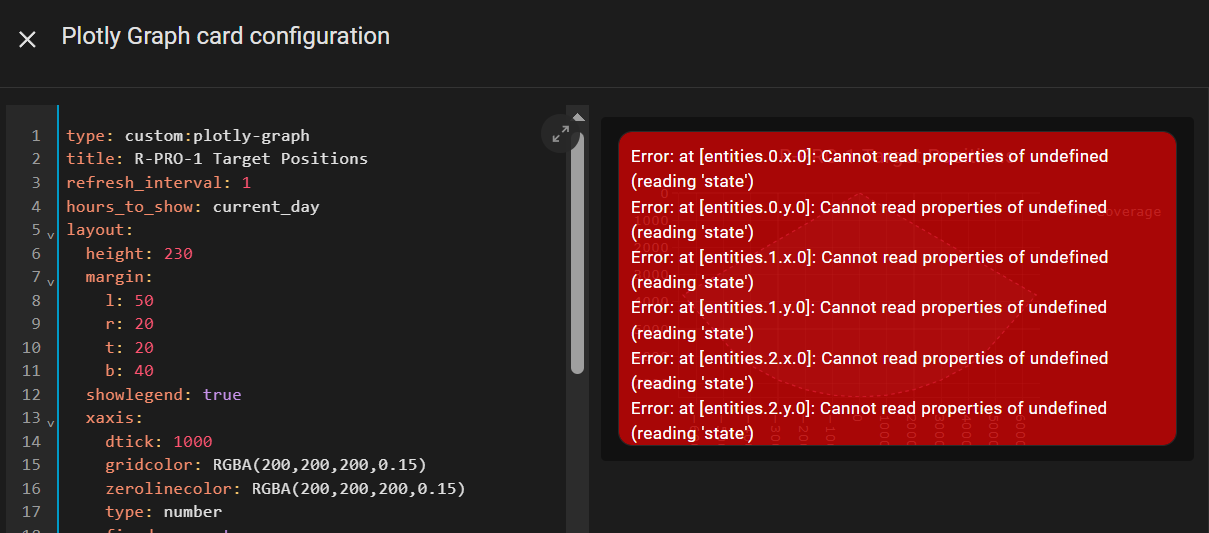
If you don't specify the correct name for your sensor, you will get an error like that shown in red. Your sensor name can be found by looking at the ESPHome integrations page and finding the R-PRO 1.
Manual Zone Creation Method (via Home Assistant)
I will briefly touch on setting your x-y coordinates manually but I don't recommend doing this the hard way. I will show this via the Home Assistant integration page but you can also set these via the sensor's built-in web page.
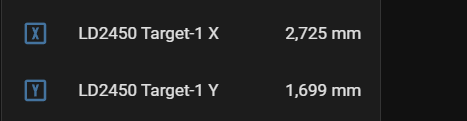
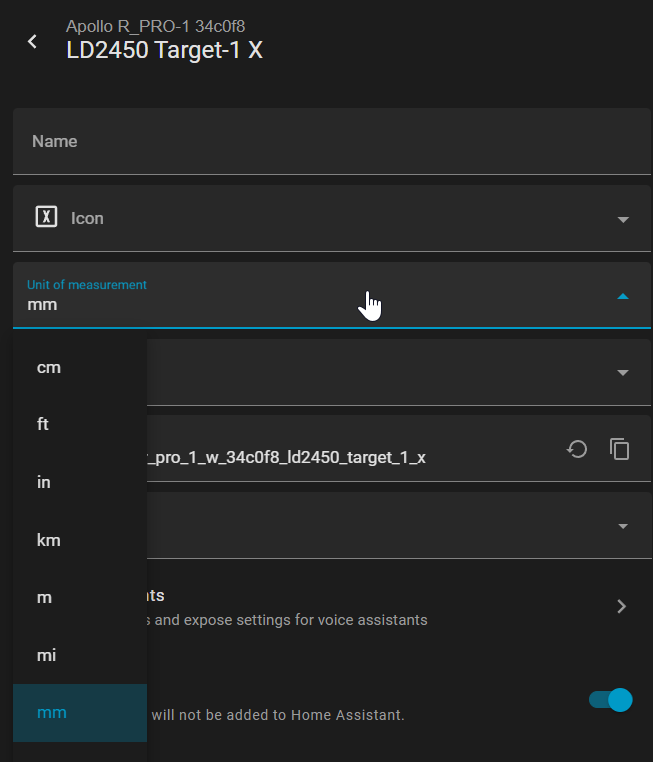
Navigate to the R-PRO 1 integration page in Home Assistant and find the LD2450 x and y sensor section. You need to change the unit of measurement to mm. Mine was set to inches but the plotly card is in mm so I had to change them. Based on Apollo's documentation it would seem that I could have just used inches and those that are on the metric system would need to change to mm. Your mileage may vary here.


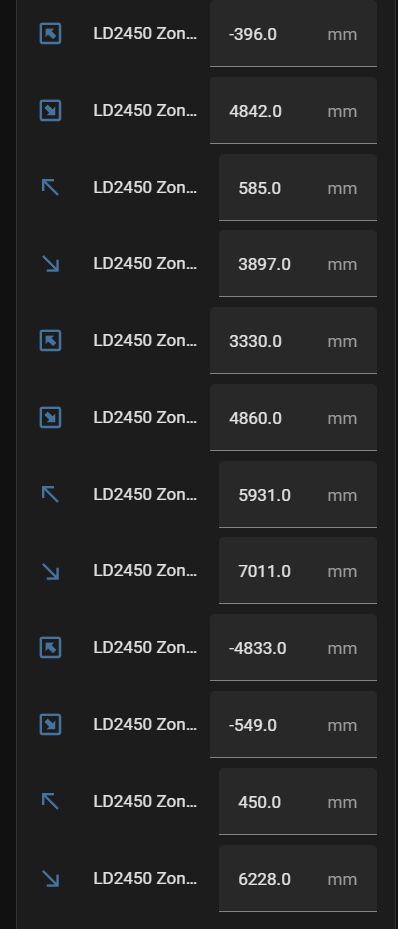
After setting the unit of measurement, scroll down to the configuration section. Here you will set the different zone coordinates. You can use the plotly card's x and y axis values to populate each of the 2 x and 2 y values per zone. Again, using the HLK Radar Tool app is preferred over doing this. The values you see in the image below were all added using the app which saved me a ton of time.
A note about sensor placement.
There is a single gang box (US) and ceiling mount option available for the this sensor. Because I wanted to utilize the PoE capability, the current wiring in my house limited the options I had to mount in the wall. For that reason, the sensor is mounted in the far corner of my home office.

The disadvantage to having the sensor in the corner is that a portion of the room isn't covered. For my purposes though, it does cover the entry so the lights come on when I enter the room and it does cover the desk where I spend the majority of my time, keeping the lights on while I work.
If I had power or PoE in the ceiling, that could be a better option but I do have a ceiling fan so that would probably be an issue. The good news is that it works well for where it is currently placed. The room on the right hand wall is set up with another zone and I could use that zone to do things for that room.
Simple Automation
I use this sensor now in place of the MSR-1 to automate turning on/off the lights and various fans, displays, etc. This is a standard Home Assistant automation so I won't go too much detail in this post but here it is if you want to use it (change to your device's sensor name and zone name if you changed the name of the zone).
This can all be done in the Home Assistant UI as well if you don't want to use this yaml.
alias: Apollo Presence Sensor Automation
description: ""
triggers:
  - trigger: numeric_state
    entity_id:
      - sensor.apollo_r_pro_1_w_34c0f8_ld2450_zone_1_all_target_count
    above: 0
    alias: Pro1 Zone 1 Has Activity
    id: Pro 1 Target 1 Active
  - trigger: numeric_state
    entity_id:
      - sensor.apollo_r_pro_1_w_34c0f8_ld2450_zone_1_all_target_count
    for:
      hours: 0
      minutes: 2
      seconds: 0
    below: 1
    id: Pro 1 Target 1 No Activity
conditions: []
actions:
  - choose:
      - conditions:
          - condition: trigger
            id:
              - Pro 1 Target 1 Active
        sequence:
          - data: {}
            action: switch.turn_on
            target:
              device_id:
                - 9a2fdda1e142429d55b662a9a08d3e58
              entity_id: switch.mini_smart_wi_fi_plug_switch
            enabled: false
          - action: light.turn_on
            target:
              entity_id:
                - light.mini_smart_wi_fi_plug
                - light.apollo_m_1
                - light.apollo_m_1_main
                - light.apollo_m_1_segment_1
            data: {}
      - conditions:
          - condition: trigger
            id:
              - Pro 1 Target 1 No Activity
        sequence:
          - action: light.turn_off
            target:
              device_id: 23e72e8b419ce6aeb47cbb13c1b98cbb
              entity_id:
                - light.apollo_m_1
                - light.apollo_m_1_main
                - light.apollo_m_1_segment_1
            data: {}
          - action: light.turn_off
            metadata: {}
            data: {}
            target:
              entity_id: light.floor_lamp
          - action: fan.turn_off
            metadata: {}
            data: {}
            target:
              entity_id: fan.media_fan
          - action: switch.turn_off
            metadata: {}
            data: {}
            target:
              entity_id: switch.studio_fan_plug
mode: single
The LD2412 sensor is an option you can add to the R-PRO 1. It almost needs its own article because there are 13 gates that can be tuned. You can see some of my issues with it in the video on this topic. Suffice it to say, I don't need it for my use case and, based on the sensor's mounting location near the floor in a corner of the room, it doesn't work very well.
I can't blame this on the sensor as I haven't put much time into moving the device to a different location to see how it behaves. The docs do state what the field of view is for the sensor and it probably doesn't work properly where I have it mounted. I have an MSR-1 that I have been using before I got the R-PRO 1 and it worked/works flawlessly, albeit sitting on a desk near where the detection zone is.
If you need detection for stationary objects such as a person sleeping in a bed or sitting still on a couch for a long period time, you might want to explore adding the LD2412 and putting the sensor in a place that it can see the area you are interested in.
That's it for this article. Make sure to watch the video and let me know if you have any questions or thoughts.