
Playing with Home Assistant SkyConnect and Migrating Zigbee

I run a Home Assistant Yellow that has a Zigbee radio already installed (and a matter-ready radio for that matter). Today I'm going to move over to the new Home Assistant SkyConnect on the same device to see how that works and then I will migrate from my Yellow to my Home Assistant blue where SkyConnect will have its permanent home. My HA Blue is my production device.
I will be using Zigbee2MQTT (I'll call it Z2M for brevity) as my software of choice to manage my ZigBee network. Also available is ZHA as well as some other options. I chose Z2M over ZHA because I originally did not have a ZigBee coordinator until I got an HA Yellow. In order to get my ZigBee entities over to my HA Blue, I had to use MQTT. It was obvious that Z2M was the answer. I can publish all my events over MQTT and my HA Blue can pick those up.
In addition, Z2M supports more non-compliant devices more rapidly. It just takes a config file upload (in most cases) and the device is supported. ZHA strives to be completely standards compliant so it may take some time for devices to show up there. YMMV on all of this. Z2M also exposes more attributes and allows control of those attributes via the UI. In the end, you need to choose what is right for you. Both Z2M and ZHA can use SkyConnect.
The Z2M interface has many layers and is best experienced in person. Here is the main Devices page for my current ZigBee network. As I'm just starting out in the ZigBee world, I don't have a lot (I have much more in z-wave).
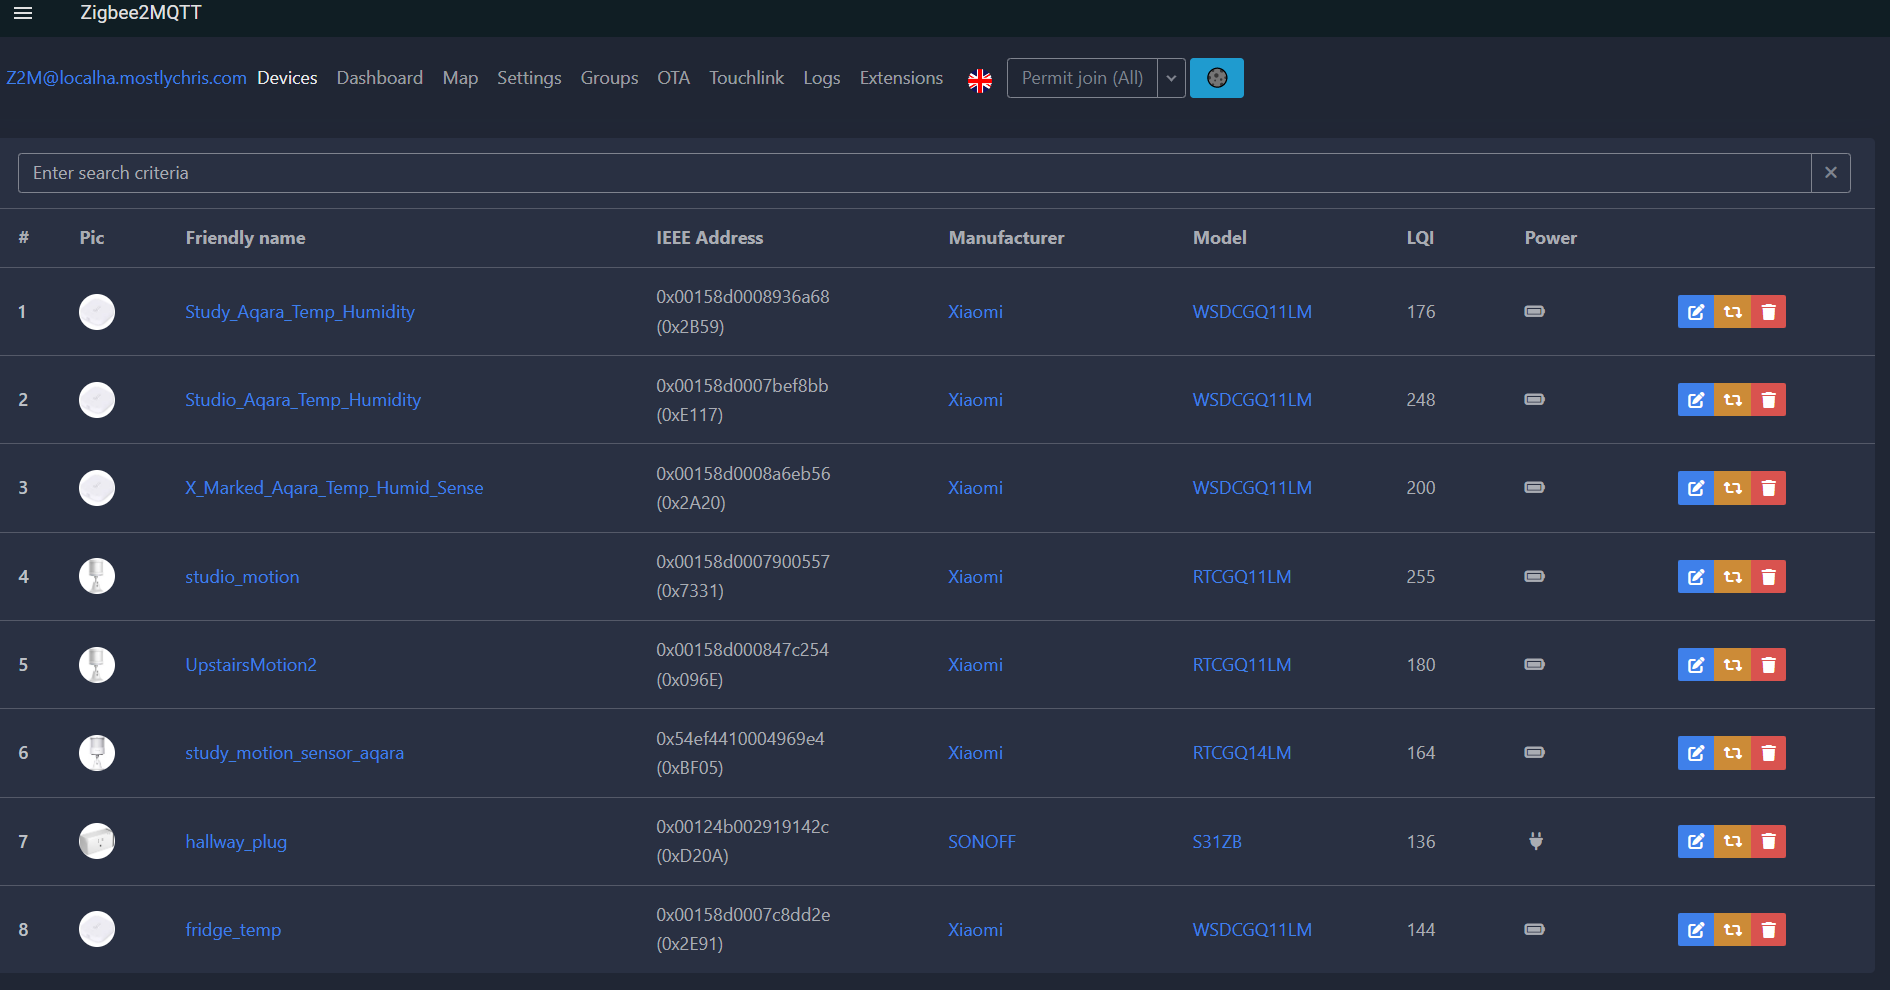
Here is a view of the Devices dashboard.

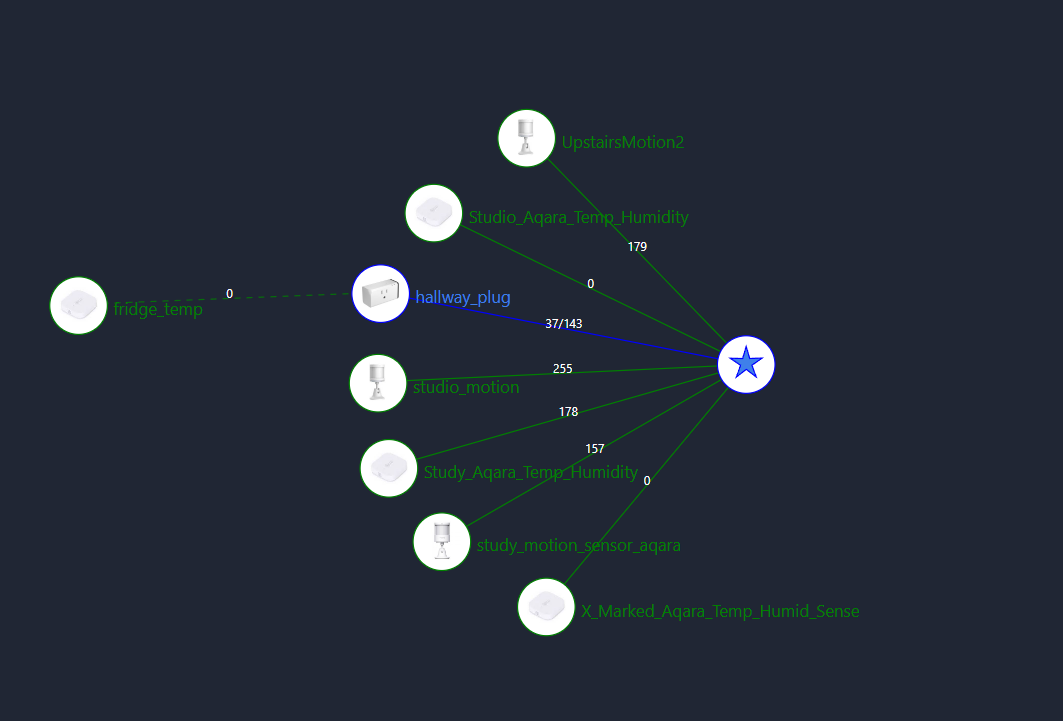
Of course, what infrastructure view would be complete without a map view? This view shows the main coordinator (star), any repeaters (blue lines), and all the end devices.
Adding the SkyConnect to your instance consists of plugging it into a USB port, determining its USB ID, and setting your ZigBee software to use the port. I HIGHLY recommend you use the supplied USB extension cable. ZigBee and USB3 ports don't play nicely together due to localized interference. It's best to get the SkyConnect away from the port.
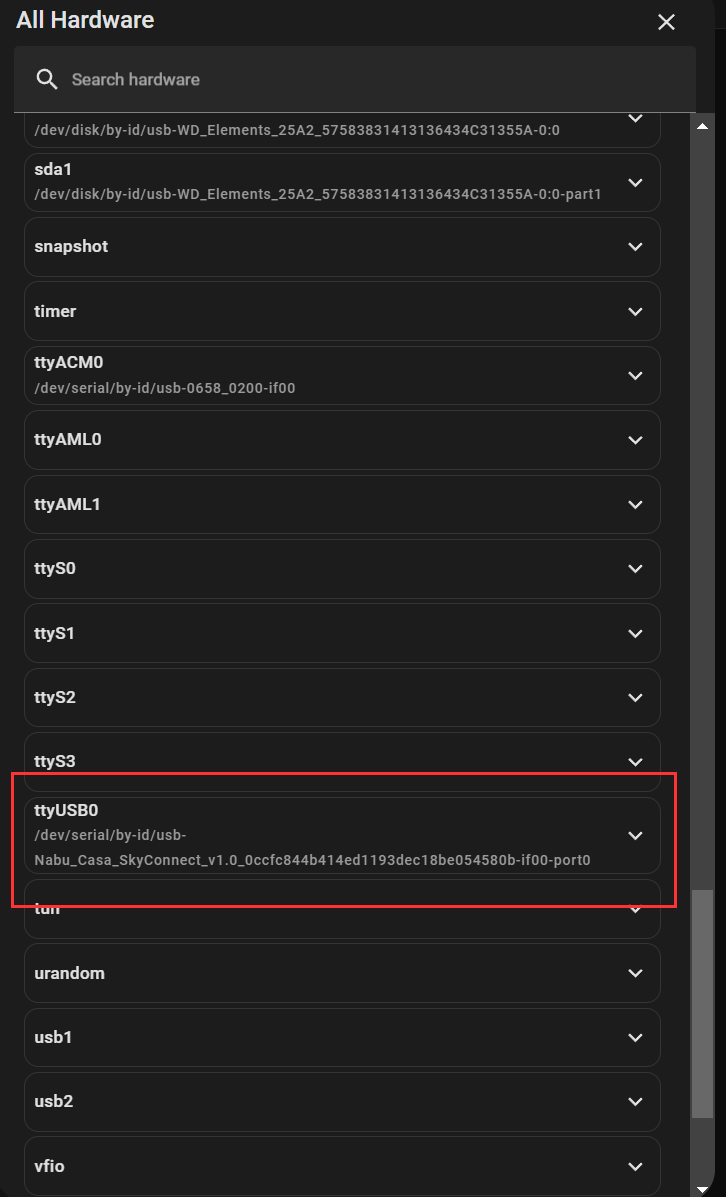
After you have the SkyConnect plugged in, locate its device by ID value in the hardware section of Home Assistant. This can be found on the system Settings->System->Hardware page. Click the "All Hardware" in the 3-dot drop-down section.

Scroll wayyyyy down to the USB section and look for the tty section. Usually, it will be ttyUSBx. Don't use ttyUSBx as the device. Instead, use the /dev/serial/by-id/.... identifier. That stays constant whereas the ttyUSBx number might change.
If you are using Z2M, you would then set your port to the ID that you got from the hardware listing. You also need to choose the adapter type as "ezsp".

All of this is better covered in my video, so I encourage you to give it a watch. The installation of Z2M, which I don't cover in this article, is also covered in the video around 13:46.
Let's say you want to migrate from your HA Yellow (or anything running Z2M) to your HA Blue (or something else running Home Assistant). That's not too bad of a task either. It involves backing up your Z2M on the source device, installing Z2M on your destination device, and copying parts of the backup over to the destination device.
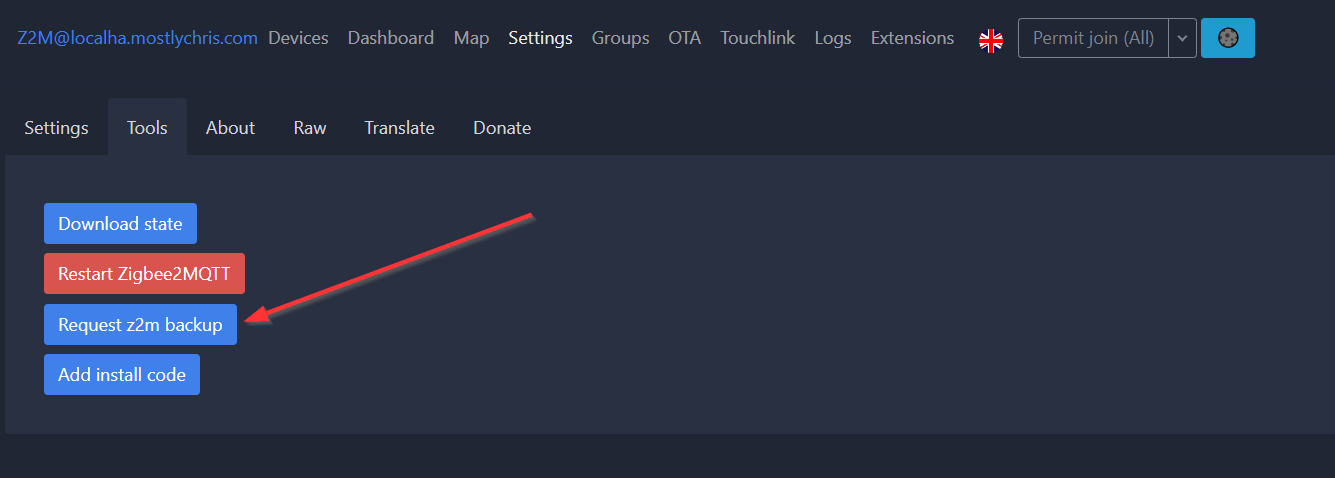
Backing up is easy. Just request a backup and then once it is ready, download it to your local computer.
If you are running supervised Home Assistant, you need to install the Samba add-on and map your config drive on Home Assistant to your local computer. Once you have installed Z2M on Home Assistant, you will have a zigbee2mqtt folder in your config directory.
It is in this folder you will copy your backed up config files. STOP Z2M FIRST if it is running! The only files you need to copy are 'database.db', 'devices.yaml', and 'groups.yaml'. The groups file isn't necessary if you've never created groups.
I had an issue with the friendly names not showing up after migration. It turns out that my install was looking for device names in the main configuration.yaml file as seen here:
homeassistant: true
mqtt:
  server: mqtt://172.16.1.121:1883
  user:
  password:
serial:
  port: >-
    /dev/serial/by-id/usb-Nabu_Casa_SkyConnect_v1.0_0ccfc844b414ed1193dec18be054580b-if00-port0
  adapter: ezsp
frontend:
  port: 8099
devices:
  '0x00158d0008936a68':
    friendly_name: Study_Aqara_Temp_Humidity
  '0x00158d0007bef8bb':
    friendly_name: Studio_Aqara_Temp_Humidity
  '0x00158d0008a6eb56':
    friendly_name: X_Marked_Aqara_Temp_Humid_Sense
  '0x00158d0007900557':
    friendly_name: studio_motion
  '0x00158d000847c254':
    friendly_name: UpstairsMotion2
  '0x54ef4410004969e4':
    friendly_name: study_motion_sensor_aqara
    occupancy_timeout: 62
  '0x00124b002919142c':
    friendly_name: hallway_plug
  '0x00158d0007c8dd2e':
    friendly_name: fridge_temp
If you want to use the devices file, you can just reference that in your configuration.yaml file with the following directive. Make sure it starts at the beginning of a new line in the file.
devices:
  - devices.yaml
The other option is to copy the contents of the devices file directly into you configuration.yaml file.
Once you have moved the files over from the backup, start up Z2M and you should be ready to go. If everything is exactly the same as it was before, your entities should just start working as they did before (assuming they are in range of the new Home Assistant device you migrated to).
As always, there is more to watch in my video so please take a look and take a moment to click here to subscribe to my YouTube channel.
Thanks for reading (and hopefully watching)!