
My TOP 5 Ways to Connect to Home Assistant

Quick shout out to Skillshare for supporting the channel and sponsoring the linked video. Get a one-month free trial for any of their thousands of courses with this link.
One of the great things about Home Assistant is the ability to choose how and what you integrate, operate, build, experiment with. You also have myriad choices when it comes to connecting to your Home Assistant instance. This will vary greatly on what you are doing and how much remote access you need. The range is from extremely simple to complicated. Many solutions also allow you to connect to other devices in your local network.
Before digging into my top 5, let me explain my level of effort scale. I rate each of these options from 1 to 10 with 1 being the easiest. This is completely unscientific and there is no complicated math. It is an arbitrary number I assign between the five different connection options. Ok, with that out of the way let's get started.
My first and arguably the easiest, with a level of effort of 1, is Home Assistant's own cloud, "Nabu Casa".
Connecting to Nabu Casa is as simple as creating an account either directly on their site or via Home Assistant itself. This is the only option that has an associated subscription cost. As of this writing, it is about $6.50 US/month billed annually. Not all countries can use annual billing yet so depending on where you are, you may have to use monthly billing.
Nabu Casa allows you to connect to Home Assistant securely without any port forwarding or messing with DNS, SSL, or having your own domain. It's as easy as it gets. Once connected, you can access all your entities and also connect to your favorite smart speaker. TTS is also available so you can make those smart speakers talk with many different accents. It's pretty cool, actually.
Nabu Casa is not a VPN solution, but rather a connection to your Home Assistant instance. If you need a VPN, read on.
My second choice is Tailscale. Tailscale gets a level of effort of 2. It's just slightly more complex to configure/use than Nabu Casa but still very easy to use.
Tailscale is a "Zero config VPN. Installs on any device in minutes, manages firewall rules for you, and works from anywhere." I find this to be true and it works well. As a matter of fact, as I type this I am using Tailscale to VPN back to my home network where my images for this story are. It is running as an add-on in Home Assistant and I use that device to route to my local network. Installing is as simple as getting the add-on in Home Assistant and starting it. Of course, you need to have a Tailscale account and you will need to install client devices. It is free up to a certain tier of use. This option also does NOT require the opening of any ports or messing with domains, DNS, etc.
Choice number 3 is Wireguard, another form of VPN.
WireGuard is a super-fast VPN solution. This one gets a level of effort of 5 because it does require some configuration on both the server and client-side. Just like Tailscale, WireGuard is an add-on in Home Assistant.
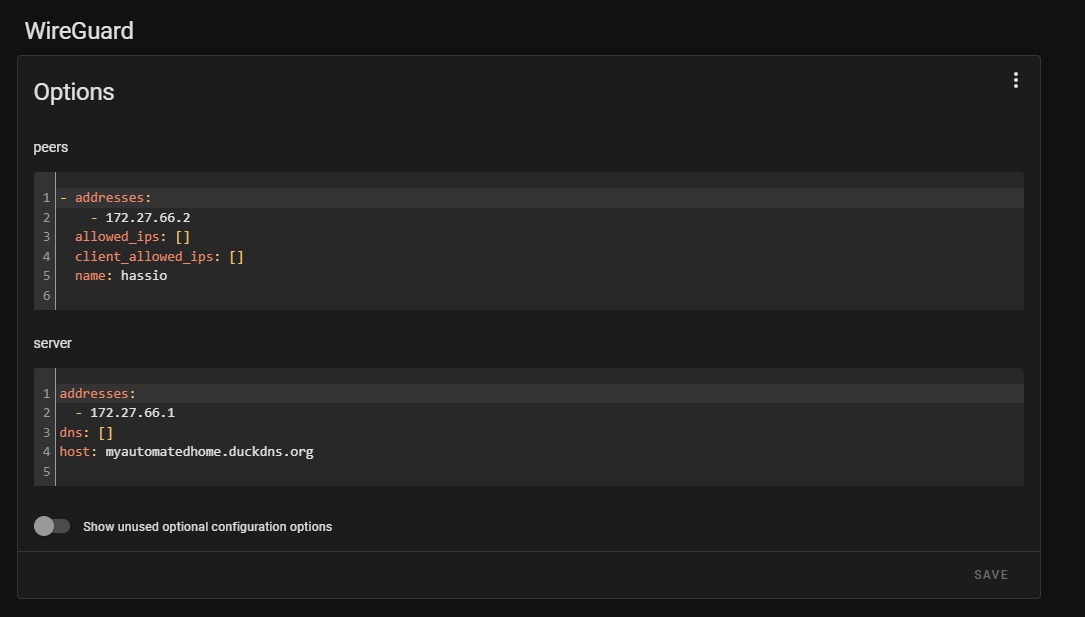
In addition to configuration, you also need to provide a way to know where your Home Assistant instance is. Typically you would need to set up a domain and point back to the public IP of where your Home Assistant is. This means you need a domain, DNS, and an open port in your firewall. You can see why this one is a bit more complicated and gets a higher level of effort. On the client-side, you can scan a QR code generated by the add-on for easy configuration. Once you have it all set up, it works great and is super fast.
Number four is DuckDNS with LetsEncrypt. This one is also more complex and gets a level of effort of 6.

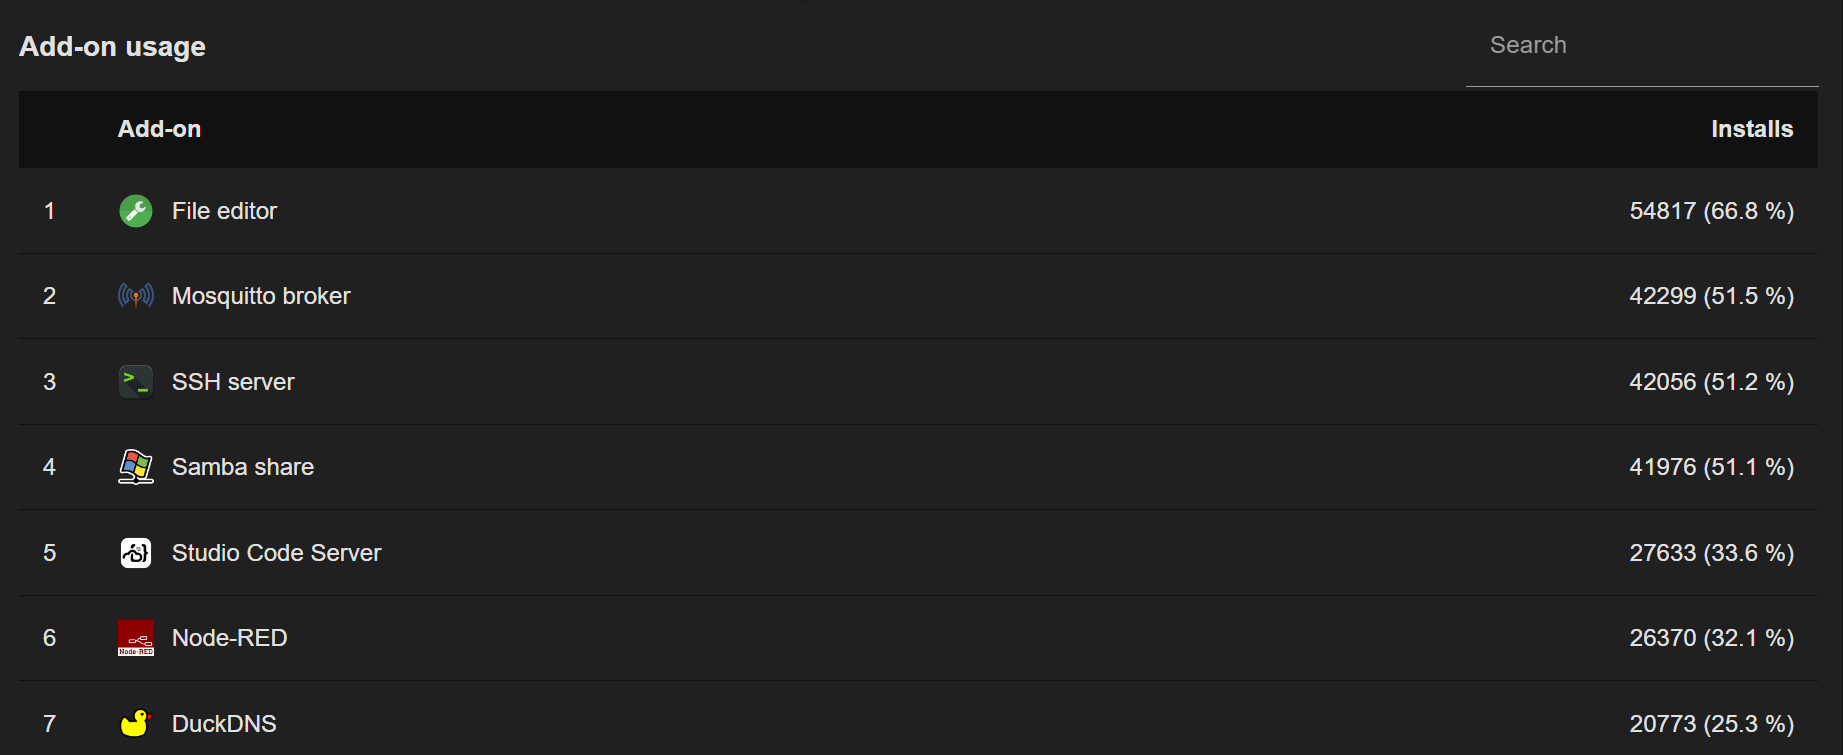
DuckDNS is fairly popular among Home Assistant installs, ranking at number 7 in terms of installed add-ons.
What makes this complex is that you need to enable SSL in your Home Assistant HTTP configuration. You also need to port forward a port to your Home Assistant instance. Enabling SSL might pose some certificate errors on devices connecting to Home Assistant locally that don't handle that will.
What DuckDNS does for you is eliminates the need to provision your own domain. You would simply use one of the domains you choose at DuckDNS (free account required). The add-on will report IP changes back to DuckDNS which means that those pesky dynamic IP addresses assigned by your ISP won't matter that much.
DuckDNS is not a VPN so you will use it to reach your Home Assistant instance. Of course, since all it does is provide DNS resolution back to your home network, you can set your router up to port forward any number of ports to different services inside your network (at your own risk, of course).
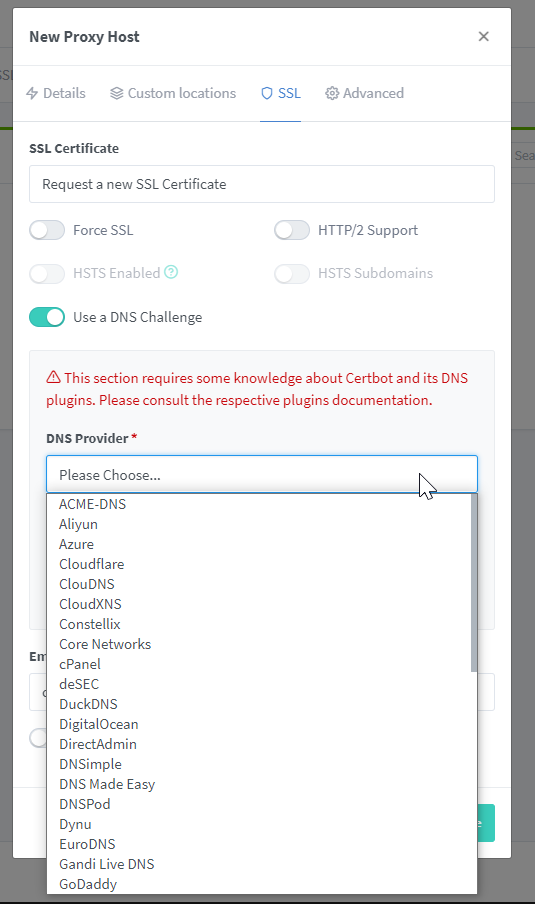
The final connection method I cover today is Nginx Proxy Manager. This one is the most complex in terms of initial config and troubleshooting should things go wrong. I give it a level of effort of 7.
Like DuckDNS above, you can use this method to connect to many devices inside your local network that run on different internal ports. The difference is that you send everything to the proxy on one port and let the proxy sort it out. You will need to provision and maintain your own domain. You will also need to forward a single port to your proxy running as an add-on in Home Assistant.
The proxy manager will handle all SSL certificate renewals automatically if you use a DNS provider that allows API access to control your DNS entries. Many of them do, as you can see from this partial list in the add-on.
You can also add access lists to control who accesses the domains in the proxy.
Make sure to give the video a watch and to get my final thoughts on all of these.