
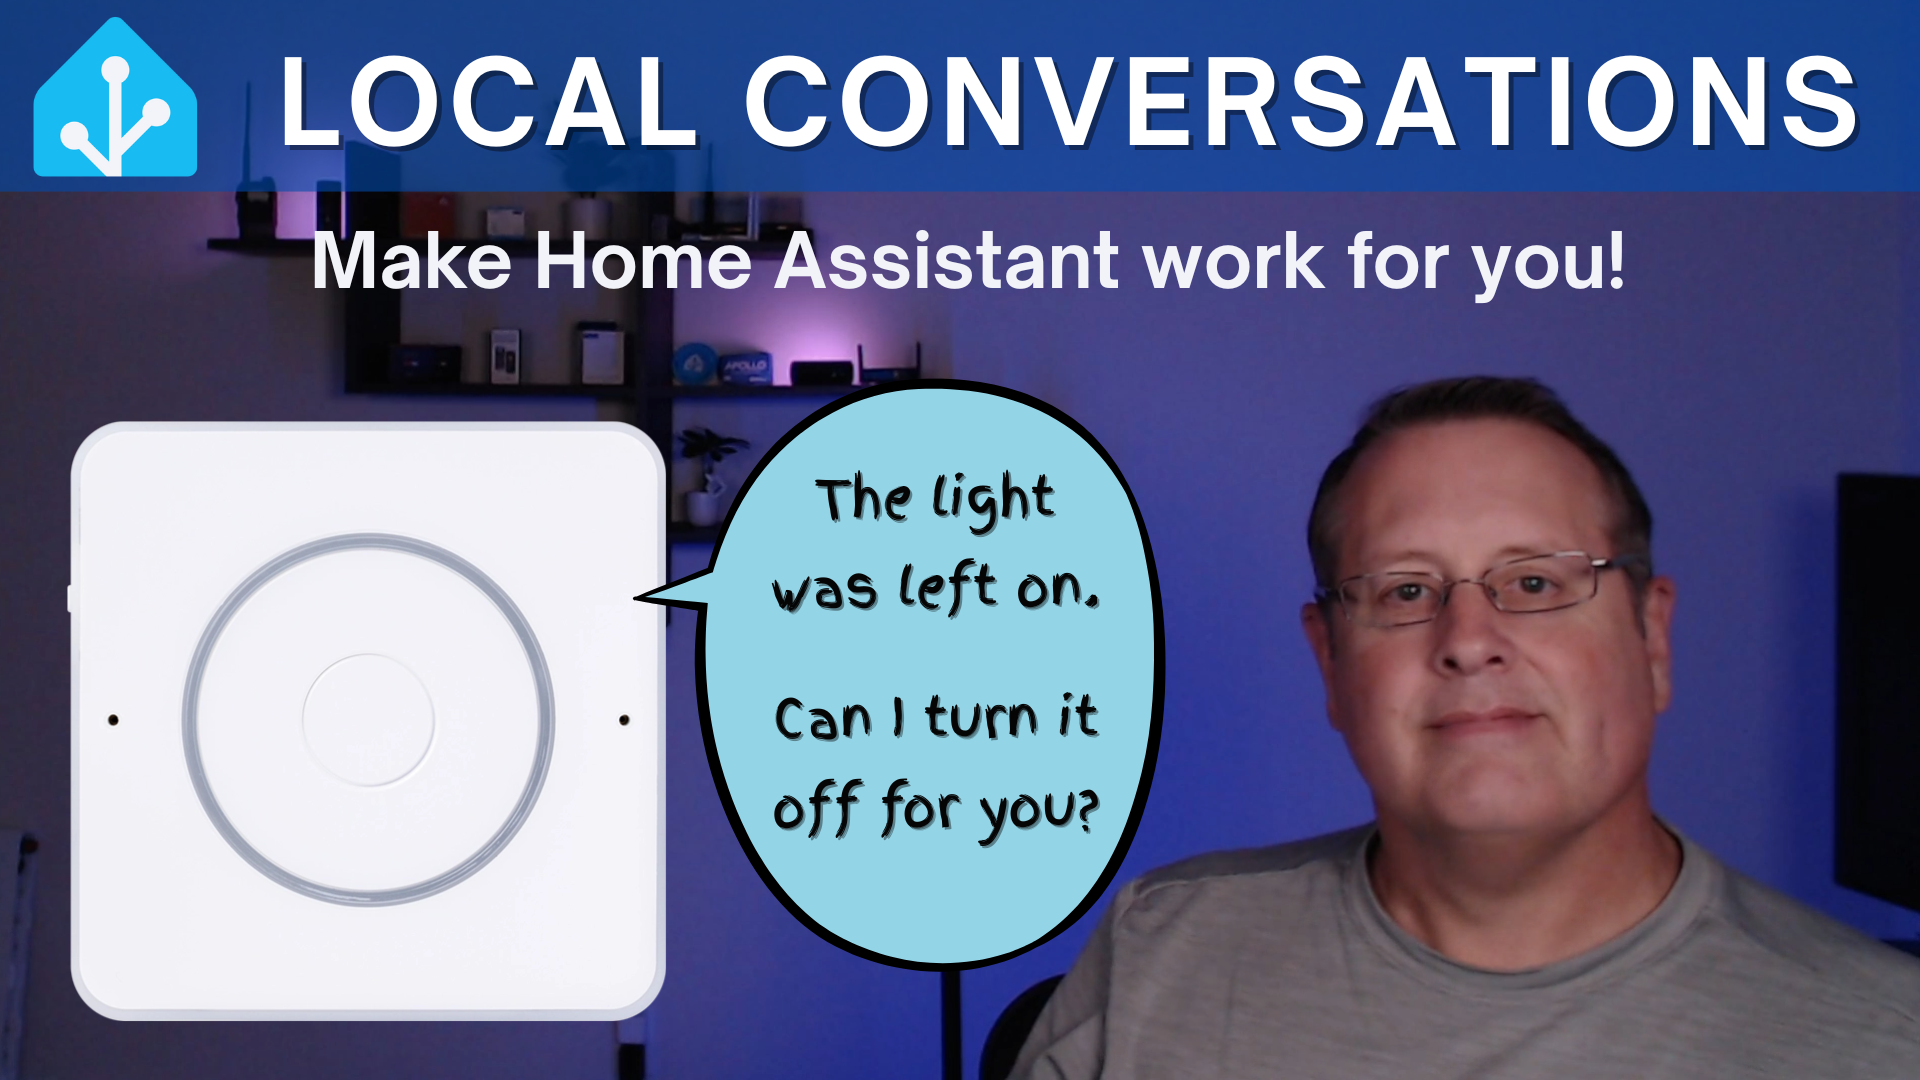
Local Conversations with Home Assistant Voice Assist
It is now possible for Home Assistant to ask YOU a question and you be able to answer conversationally. This does not require that you use an LLM. It is all handled locally.
The Home Assistant roadmap promised to make Assist, Home Assistant's own voice assistant, more conversational. In the July 2025 release of Home Assistant, they did just that. It is now possible for Home Assistant to ask YOU a question and you be able to answer conversationally. This does not require that you use an LLM. It is all handled locally. If you don't have the local hardware power for this and you subscribe to the Nabu Casa cloud, you can use their hardware for super-fast responses.
Be sure to watch my video on this topic.
How does this work, you ask? It relies on automations in Home Assistant. This follows the normal automation path. Trigger->Conditions->Actions.
Let's first create a trigger. For testing and demo, I created a helper that I can toggle on and off. Eventually, I will apply this to the garage door or some lights, etc., but to keep the peace and the acceptance factor, I don't want to experiment with "production" household items. If you want to play around first, I recommend creating a fake entity like this.

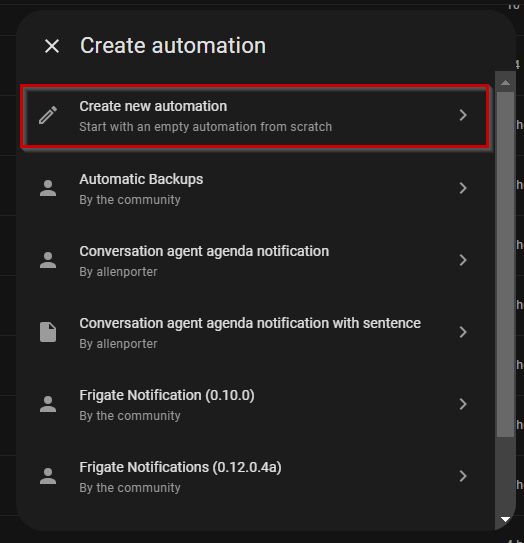
On to the automation. Navigate to Settings -> Automations and Scenes (or use the 'c' key shortcut and type automations). Once there, click on the blue CREATE AUTOMATION button on the bottom right of the screen. Choose Create new automation.
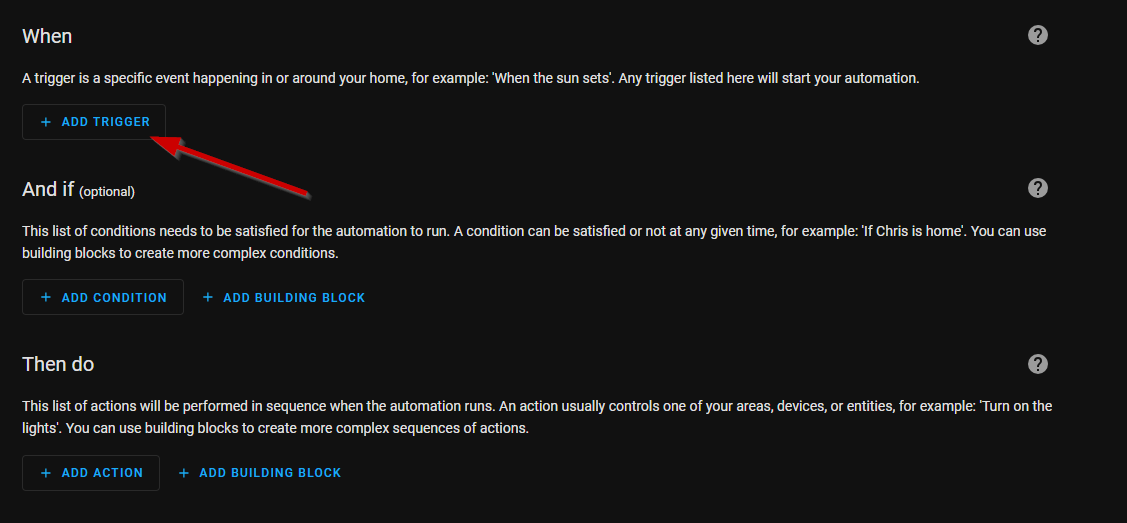
On the next screen, you will need select a trigger. In the "When" section, click on "Add Trigger".
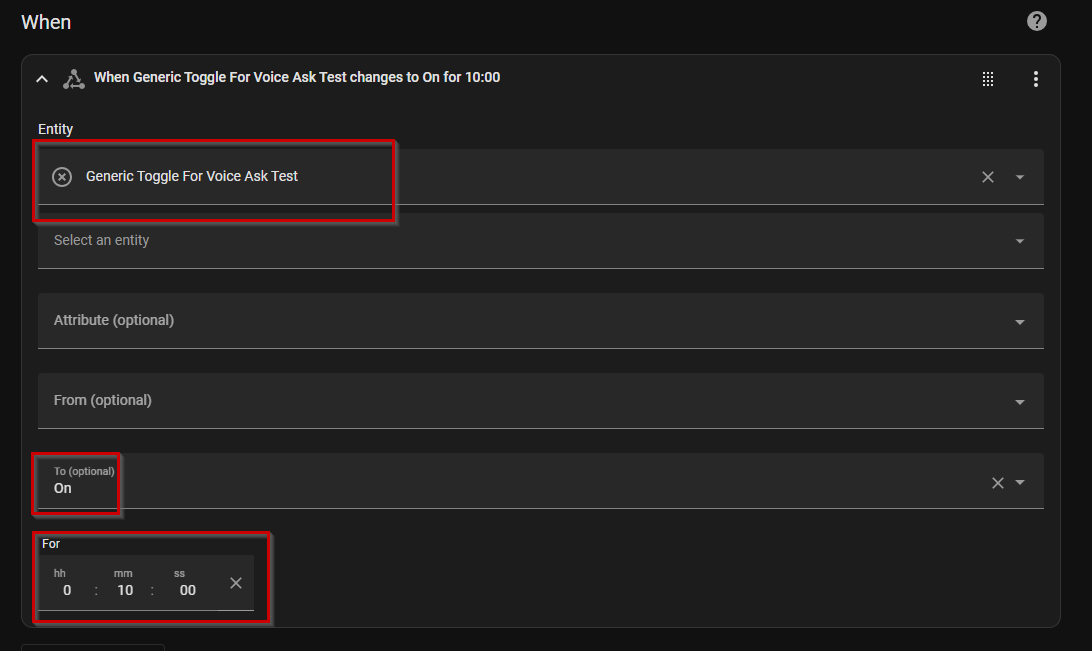
You will want to select the device you want to interact with. This could be your garage door, a light, a door lock, etc. In my case, I'll use the test helper I set up. You will also want to select the criteria and the amount of time to wait. I want the trigger to happen when the entity moves to an "on" state, and that entity remains in that state for 10 minutes.
You can add additional conditions if you want via the "And if (optional)" section if you want, but I will skip that for now. Next, you will want to add the "Then do" settings and actions. I will start by adding an Assist satellite action and then an Ask question sub action. This will allow me to send a sentence to my assist speaker and start the conversation.
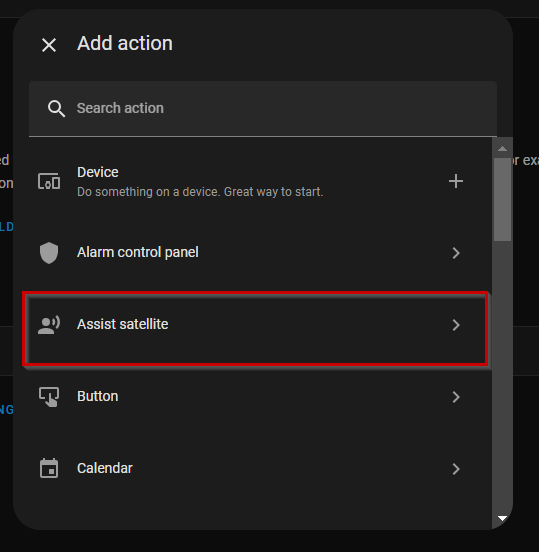
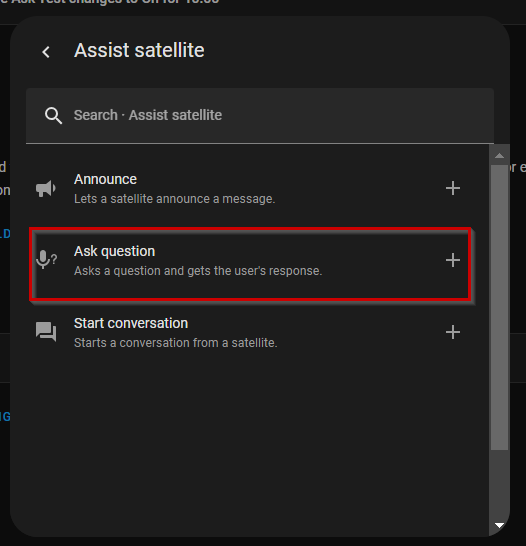
Select the Assist satellite and the Ask question options\
On the next screen, you need to select the entity you are going to have the conversation with. This will be an Assist satellite. You need to enter the question that will be asked based on what you set for the trigger above. In my case, I'm going to ask about the kitchen light for demo purposes, even though I am just using a fake helper.
Most importantly, you need to provide some answers by clicking the ADD button in the answers section. We'll create a "yes" and "no" answer.
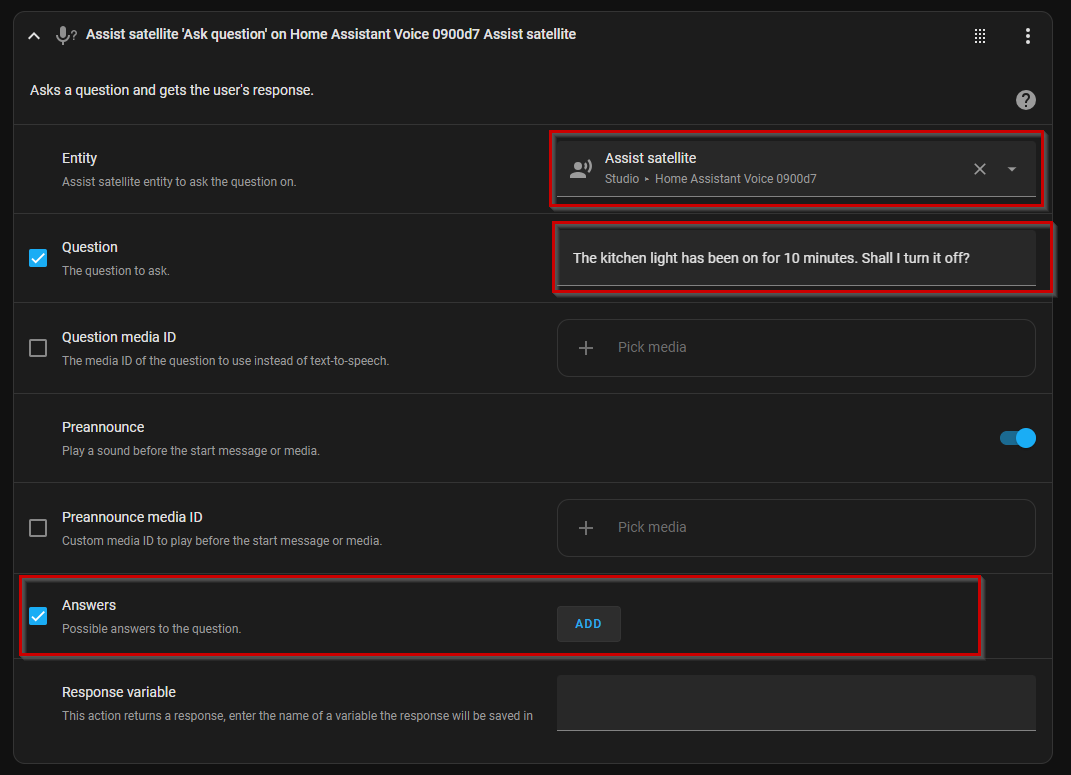
The Answer ID is important as that is how we will determine what action(s) to take based on how you answer the question. The sentences are all the different ways you can so "yes" to the question.

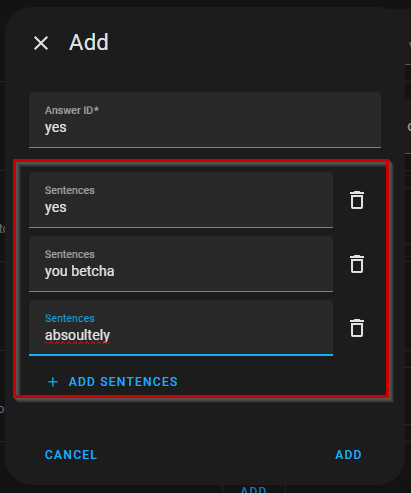
Create the "yes" answer ID and add some sentences
You need to do the same thing for the "no" option
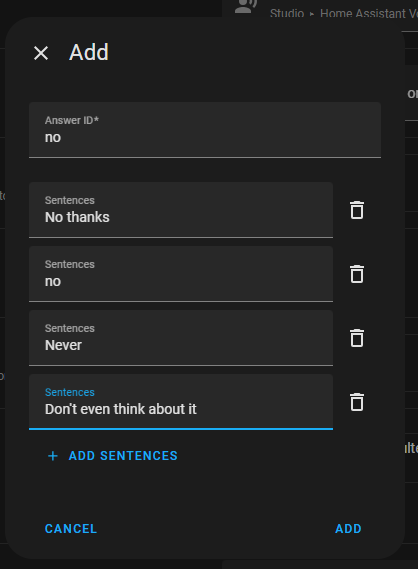
Once you have added both of these by clicking ADD on the bottom of each sentence box, you will see the sentence displayed in the Answers section. You also need to populate the Response variable box. You can put whatever word you want in there. I'll use the word "response". We'll need this later.

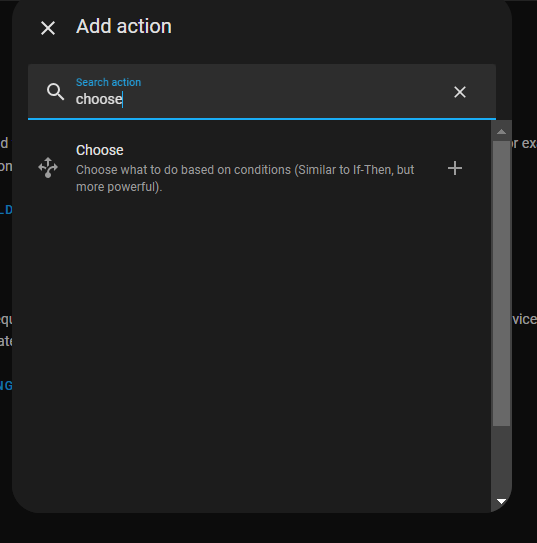
After doing the above, you will create another action. This time, it will be a "Choose" action. This allows us to set a couple of conditions based on whether you responded yes or no to the question.
We will then select the ADD CONDITION option and select template as the option type.


This is where you will post some yaml (don't be scared of yaml). In this case, it is one line that evaluates the response id you set above. You will need to change the word "response" to whatever word you used. In this case, you answered yes to the question this template will evaluate to true.

We need to add two actions now (or more if you want) to this condition. The first will be to have the satellite say something back to you and the second will be to turn off the light, or helper in my demo case.

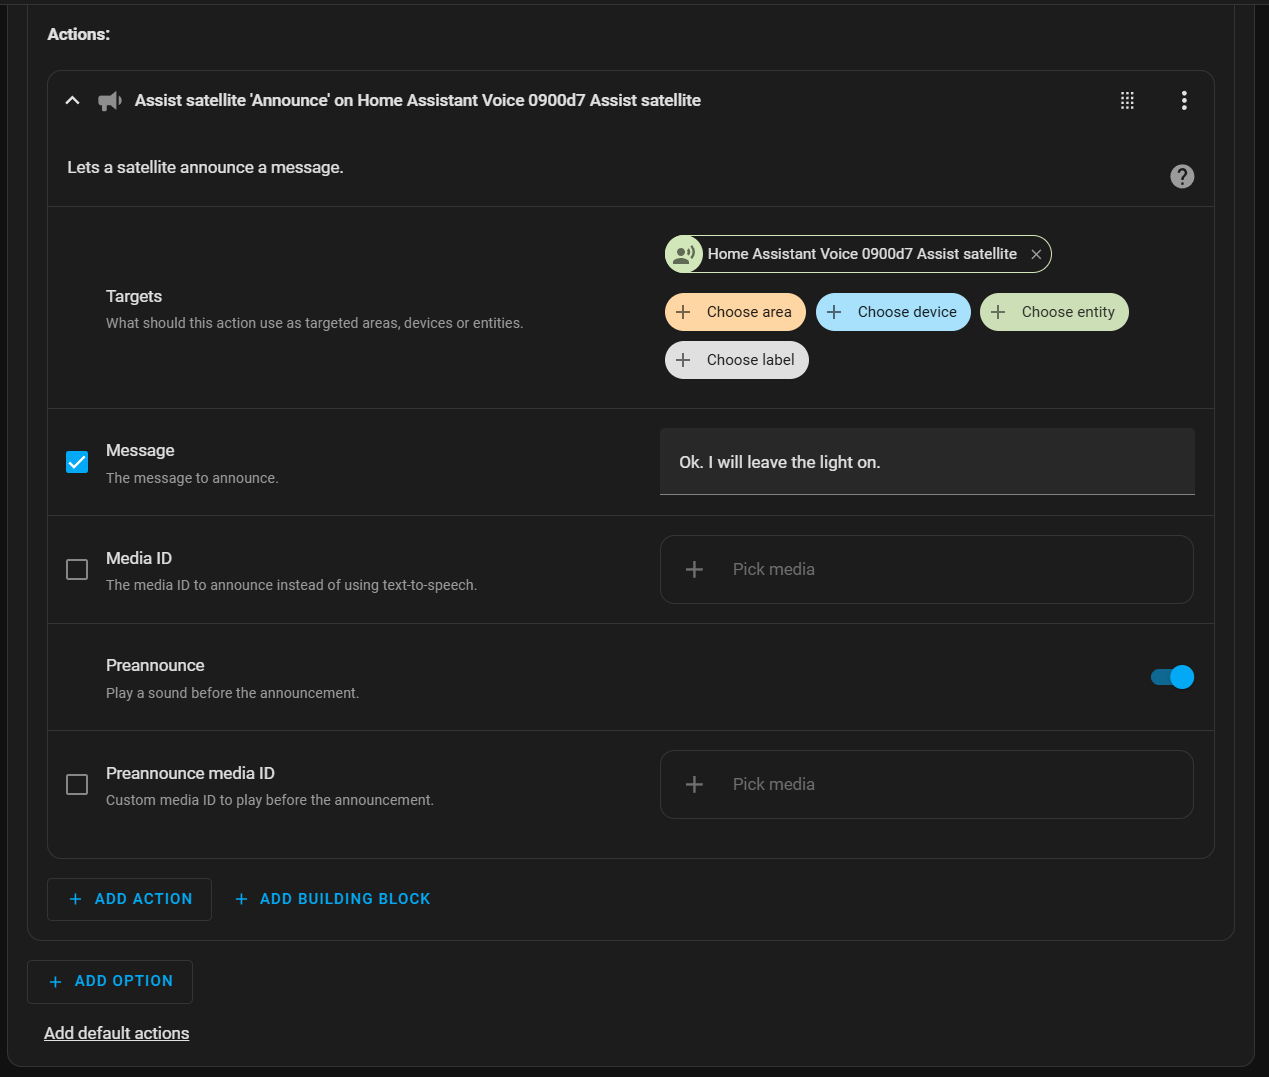
This time will select Assist satellite and then Announce. Choose the same satellite that set above to ask the question and then input a sentence you want the device to say when responding yes.

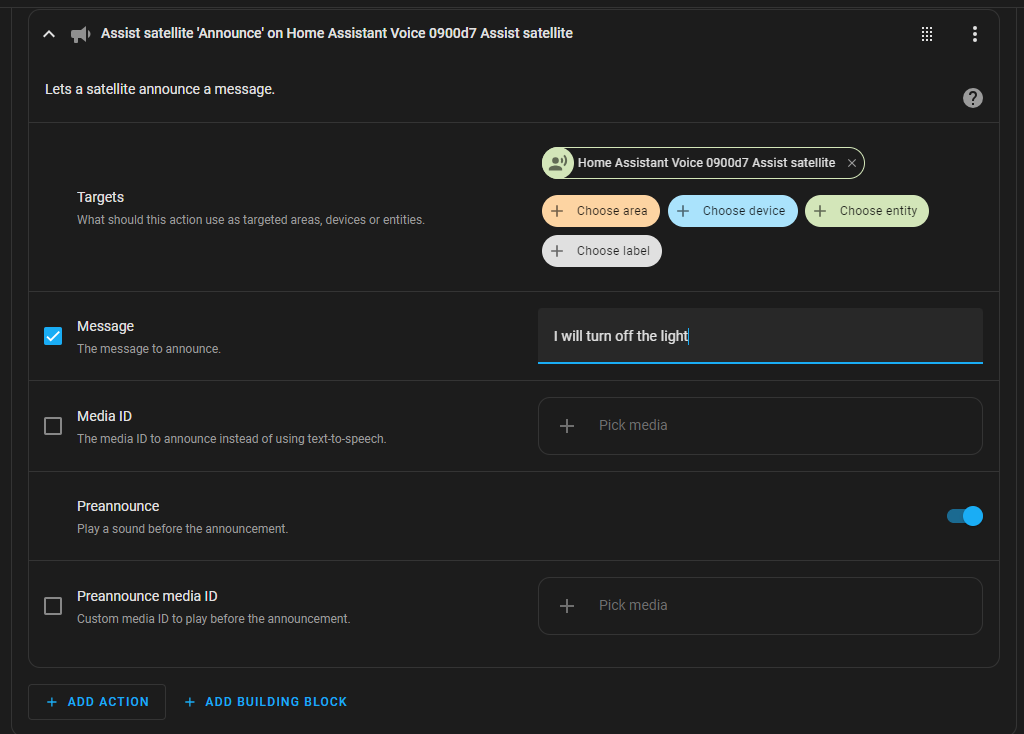
This time choose announce from the voice satellite option and fill out the values
Add the section action by again choose the ADD ACTION button under Option 1. In my case I will turn off the input boolean helper I created for this demo.

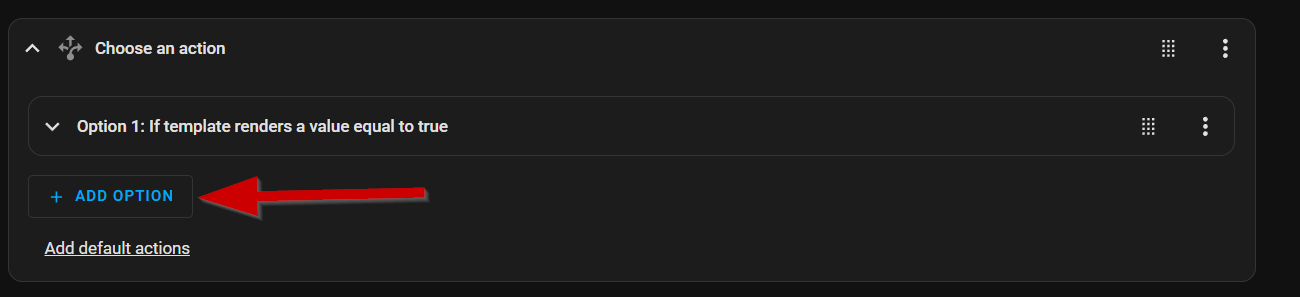
You will now add a second option to provide a response if you tell Assist not to do anything based on the "no" responses set above.
Add a template condition just like you did for the "yes" response and this time set it to equal "no".

Add another Assist announce action to state whatever you want to say when you aren't going to have Home Assistant do anything.
...and that's all there is to it. You now have a conversational automation with Home Assistant, with Home Assistant starting the conversation and you responding with whatever you want Home Assistant to do.
Did you know that there is an easier way? The Home Assistant team has already created a blueprint that you can use. If you are not familiar with blueprints, you can read about them here. In addition to making it easier to set things up, as of this writing there are already 49 different "yes" response options and and equal number of "no" responses.
answers:
- id: "yes"
sentences:
- "Yes"
- Sure
- Absolutely
- Go ahead
- Please do
- Of course
- That's fine
- Do it
- Yep
- Yeah
- Ok
- Okay
- Affirmative
- I agree
- Sounds good
- You got it
- Definitely
- By all means
- Why not
- Indeed
- Confirmed
- Let's do it
- Certainly
- Right
- Fine
- All good
- Make it so
- I approve
- That's right
- I'm okay with that
- No problem
- Go for it
- Sounds fine
- I'm on board
- Proceed
- It's a yes
- I'm in
- Okay yes
- That's a yes
- Yeah go ahead
- I'm good with that
- Positive
- Do that
- It's okay
- Works for me
- I'm fine with that
- Yep do it
- Please go ahead
- That's what I want
- Exactly
- id: "no"
sentences:
- "No"
- Nope
- Don't
- Please don't
- No thank you
- I don't think so
- Not now
- That's a no
- I'd rather not
- No way
- Not really
- Cancel that
- Negative
- Stop
- Don't do it
- I said no
- No need
- Never mind
- Not necessary
- No that's not right
- I disagree
- Skip it
- Don't proceed
- I don't want that
- Don't go ahead
- Leave it
- That's incorrect
- I prefer not to
- No thanks
- I'm not okay with that
- I'm saying no
- Let's not
- Not this time
- I'm not in
- Please don't do that
- Don't take action
- I'd say no
- No action needed
- I'm against that
- I'd skip it
- Rather not
- Not today
- I'm not sure better not
- That's not what I want
- That won't be necessary
- I don't agree
- No that's wrong
- Let's skip that
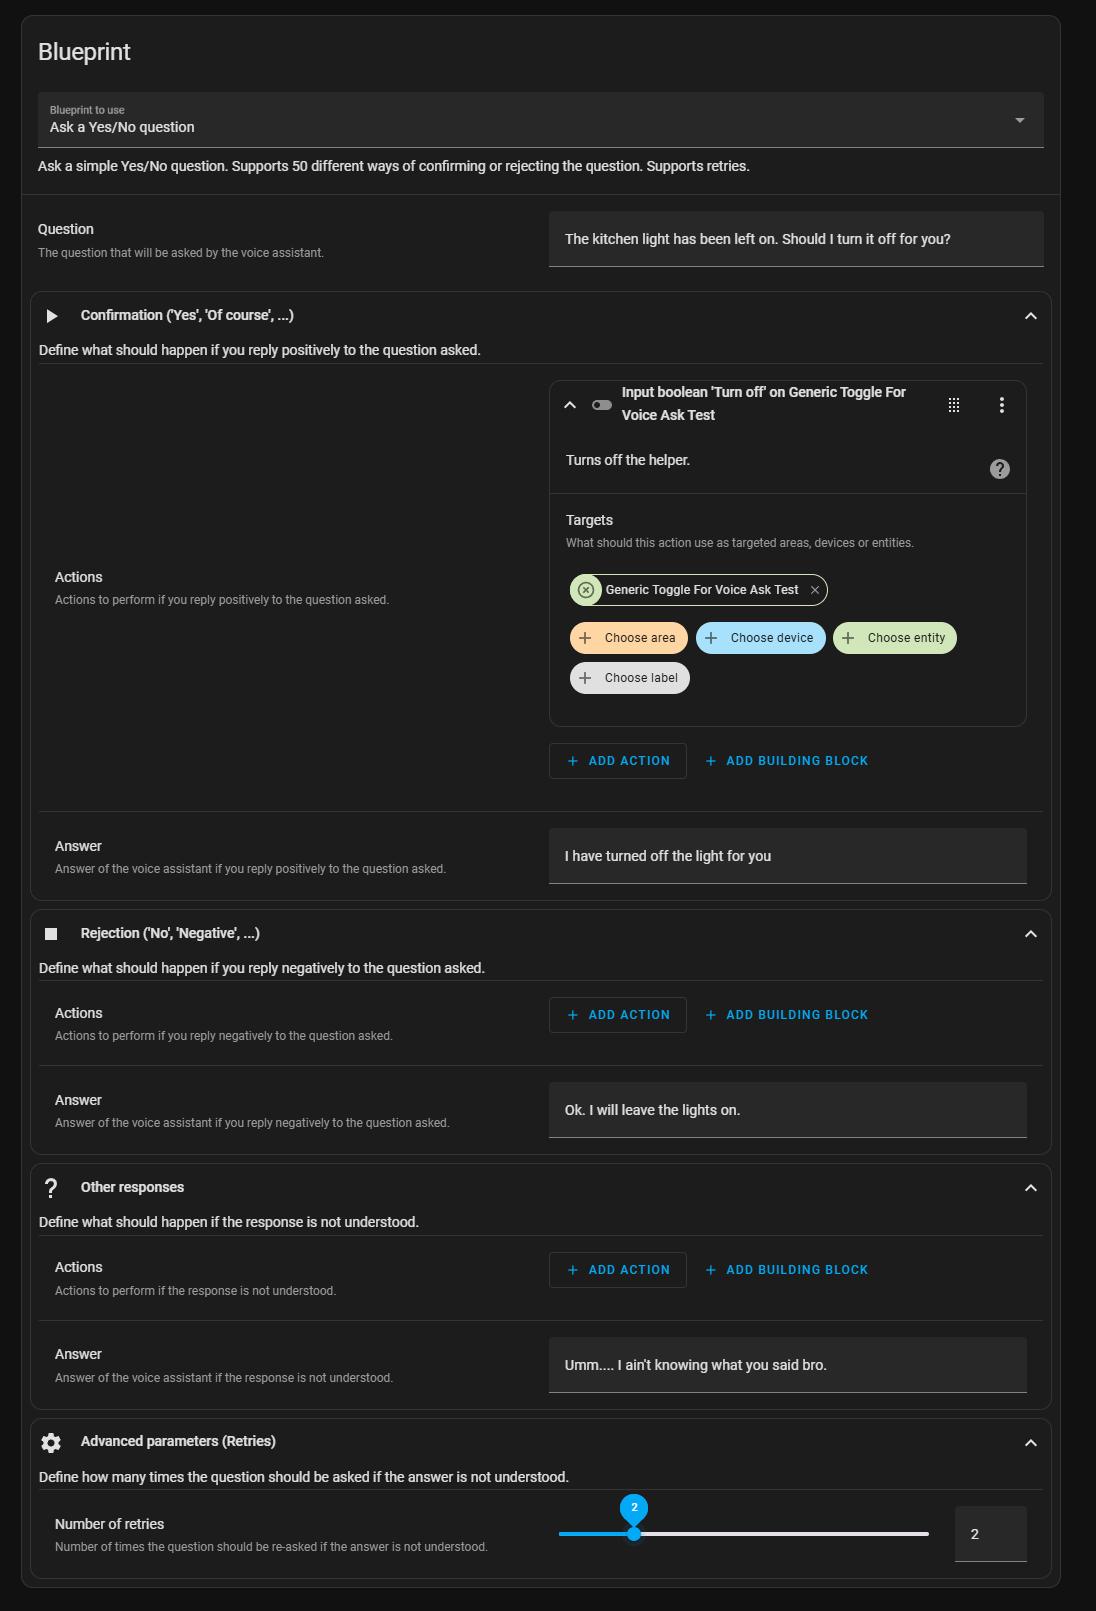
- I'm not comfortable with thatUsing the blueprint is as simple as importing by click the blueprint link and adding it to your Home Assistant instance. Once imported, you will find it in your blueprints section. Click on the 3 dots on the right hand side and create a new script (this is a script type blueprint).

In the script, I filled everything like you see below and saved it. It will ask you to rename it and then it will be saved under the Scripts section. An added benefit of using this blueprint is the ability to set retries in case Assist didn't understand your response as well as set a custom response for this scenario. This is done in the "Other responses" and "Advanced parameters" sections.
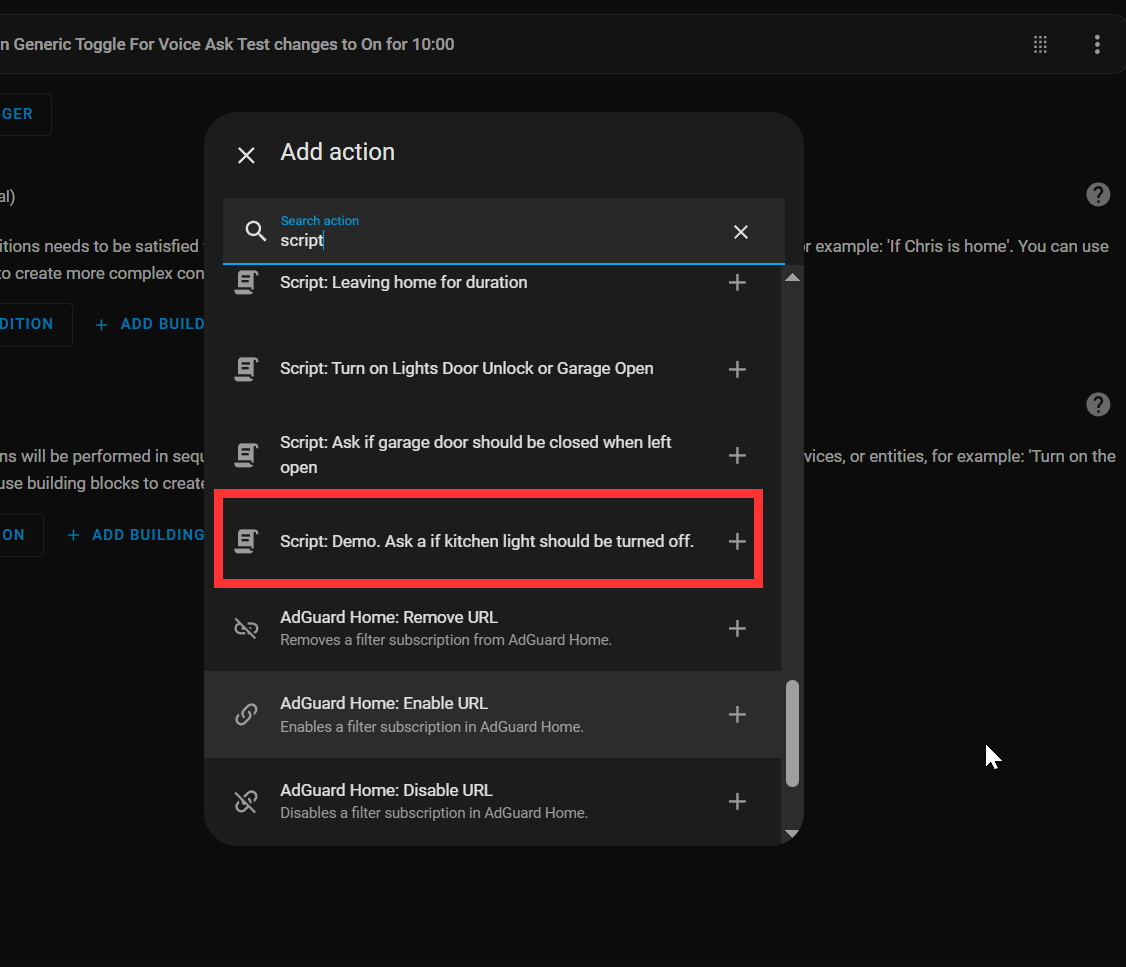
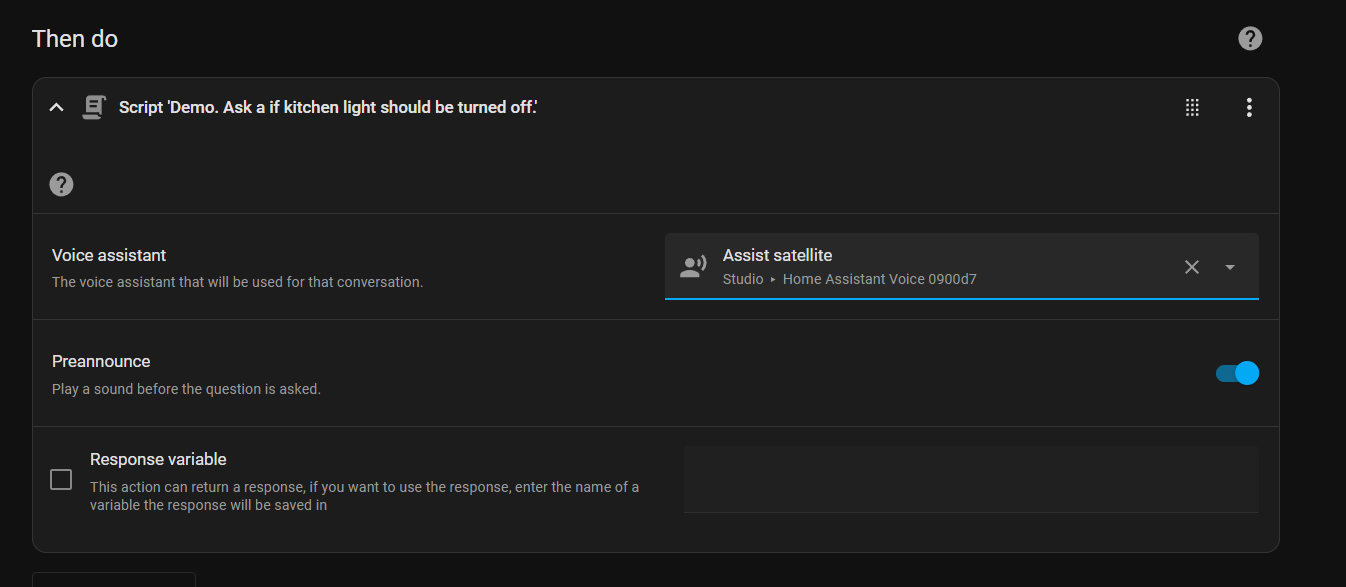
You can now use this in your automation. In the example automation I created in this post, you would replace all the action items in the "Then do" with this simple script.
Choose your Voice assistant for the conversation to happen and choose if you want the preannounce to play.
Using a blueprint greatly reduces the amount of work needed to build a useful automation. This is the full yaml for the above automation using the blueprint.
alias: Demo 3 voice ask test
description: ""
triggers:
  - trigger: state
    entity_id:
      - input_boolean.generic_toggle_for_voice_ask_test
    to: "on"
    for:
      hours: 0
      minutes: 0
      seconds: 5
conditions: []
actions:
  - action: script.demo_ask_a_if_kitchen_light_should_be_turned_off
    metadata: {}
    data:
      preannounce: true
      voice_assistant: assist_satellite.home_assistant_voice_0900d7_assist_satellite
mode: single
You would create scripts using the blueprints for all the various conversations you want to have. There will likely be more blueprints and examples from the community that will showcase this new feature. All I need now are more Assist satellites around my house.
That's it. I showed you the long way and the shorter way of creating a voice conversation in Home Assistant. Now you can use your imagination to create other conversations based on what you want Home Assistant to do for you.