
Home Assistant Remote Access with Cloudflare Argo Tunnel

Home Assistant sits inside your local network (I hope) and that means it is behind your ISP router and connection. There are MANY ways to connect to Home Assistant in this type of setup. By far, the easiest way is to sign up for a Nabu Casa account and then click the enable cloud button in Home Assistant. There is an annual fee associated with Nabu Casa and that fee goes directly to supporting future development and maintenance of the Home Assistant Core.
That is not the subject of today's post.
I've posted many videos on remote connection to Home Assistant. Some are easier than others. Some require knowing networking and DNS. No matter how you connect, there is probably a method that makes sense for your use case.
In this post, we're going to talk about creating a secure connection between your internal network where Home Assistant sits, and Cloudflare using the Cloudflare Tunnel. This will allow you to connect directly to Home Assistant using a public hostname.
There are some prerequisites to using this that I don't cover here or in the associated video.
- You need a Cloudflare account.
- You own a domain and are using Cloudflare DNS for this domain.
- You have something in your network that you can install the Cloudflare connector on.
There are two ways to set this up. You can use either the CLI method or the dashboard. The easiest way is to use the dashboard, which is why the prerequisites are important since Cloudflare will do all the DNS work for you.
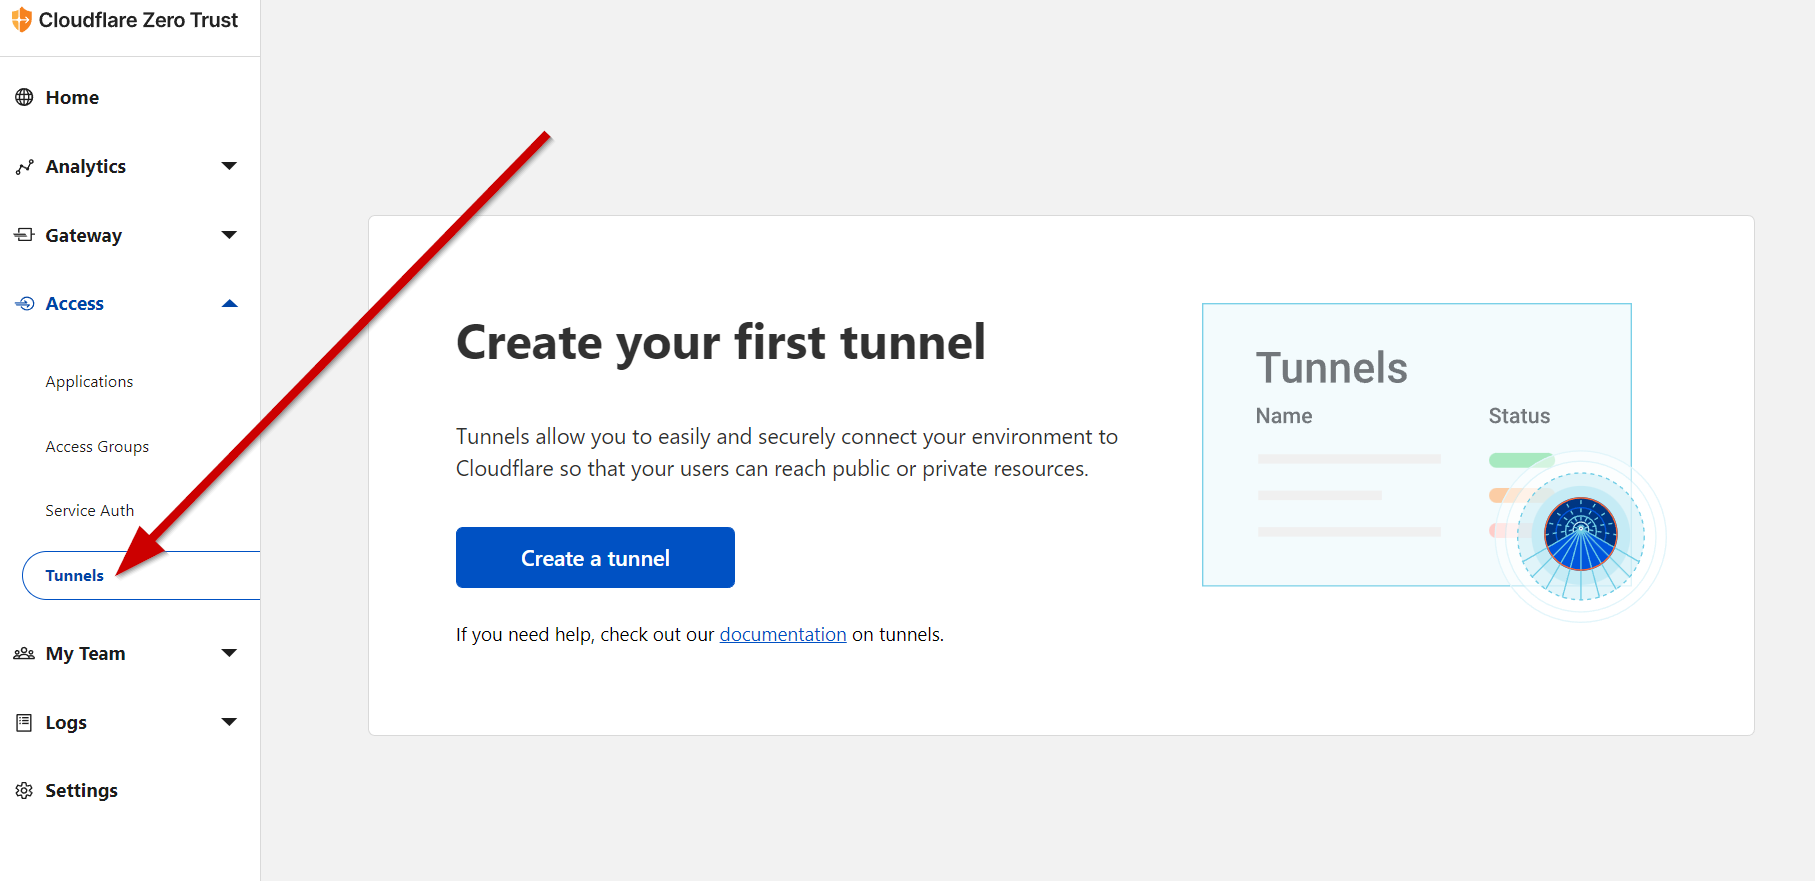
You first launch the Zero Trush Dashboard and select Tunnels from the left and then click Create a tunnel.
You'll give your tunnel a name and then choose which environment you will be installing the connector. You can see that there are many options for running a connecter. Choose wisely as this typically needs to be something that is up and running all the time. I use a docker container in Ubuntu 20.04.
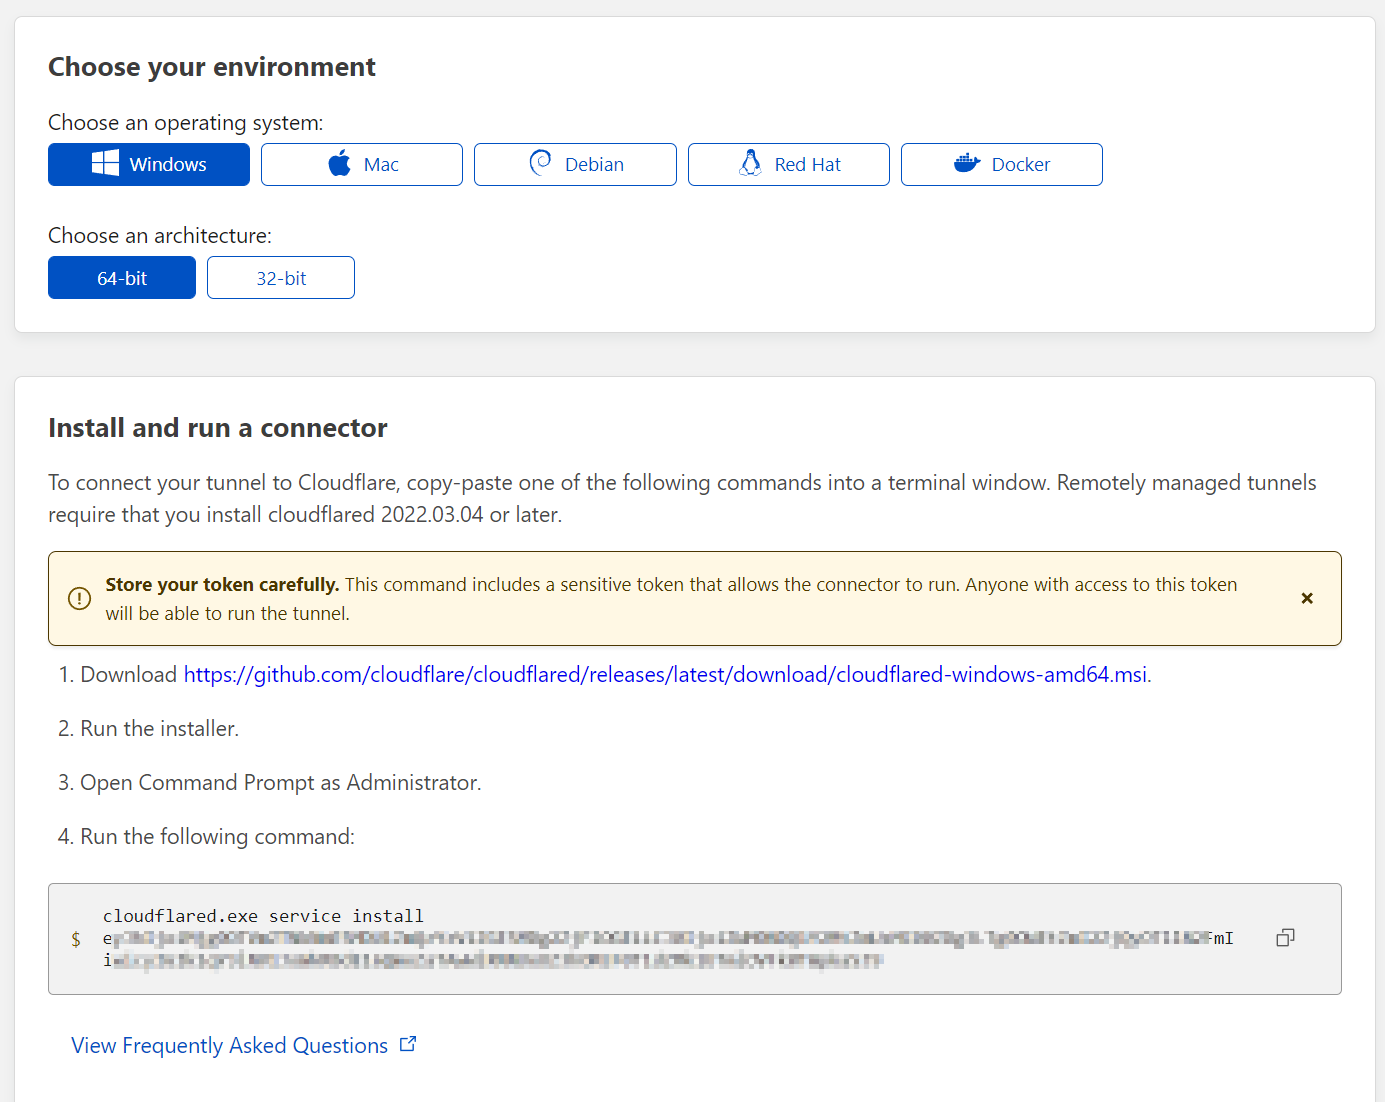
Once you install the connector software, it will make a tunnel to the Cloudflare data centers and create endpoints. In this case, it created 4 endpoints in two different data centers.

If that is successful, you now have a connection from your local network segment to Cloudflare. This also means that Cloudflare knows how to get from their edge back into your network so you can access Home Assistant.
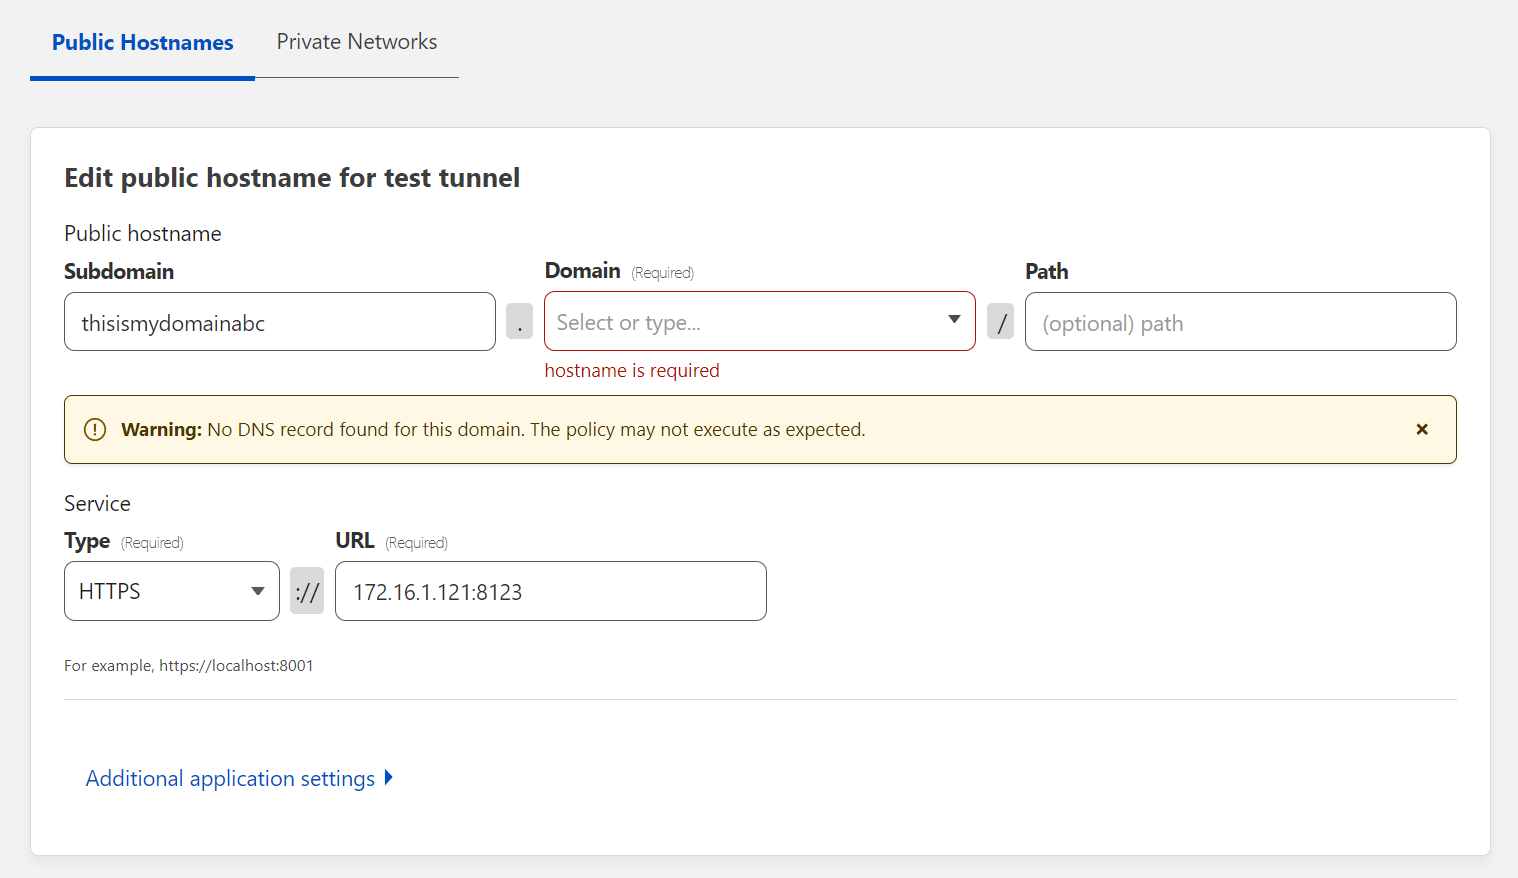
The next step is to create a public hostname that sits in your already set-up domain. For example, if your domain is "thisismydomainabc.com", you would create something like "homeassistant.thisismydomainabc.com". You would set the service type and the URL of where your Home Assistant (typically IP address).
There are plenty of other services you could use such as SSH, RDP, UNIX+TLS, SMB, and more. Cloudflare tunnels can be used for more than just Home Assistant. In fact, you can add more public hostnames with different services to the same tunnel.
Once you have created the tunnel and public hostname, Cloudflare will update the DNS in your domain. You set Cloudflare as the DNS provider for your domain right? It's all automatic. Give it a few minutes and voila, you can connect to Home Assistant remotely and securely.
If you have security policies set for the domain you are hosting at Cloudflare, all of those policies also get applied to the public hostname using your tunnel. This means that you can restrict/control access to your Home Assistant instance with caching rules, firewall rules, etc.
For a walk-through setting all this up, take a look at my video. Take a moment to subscribe as well! I would really appreciate it as it appeases the algorithm and helps others find my videos.