
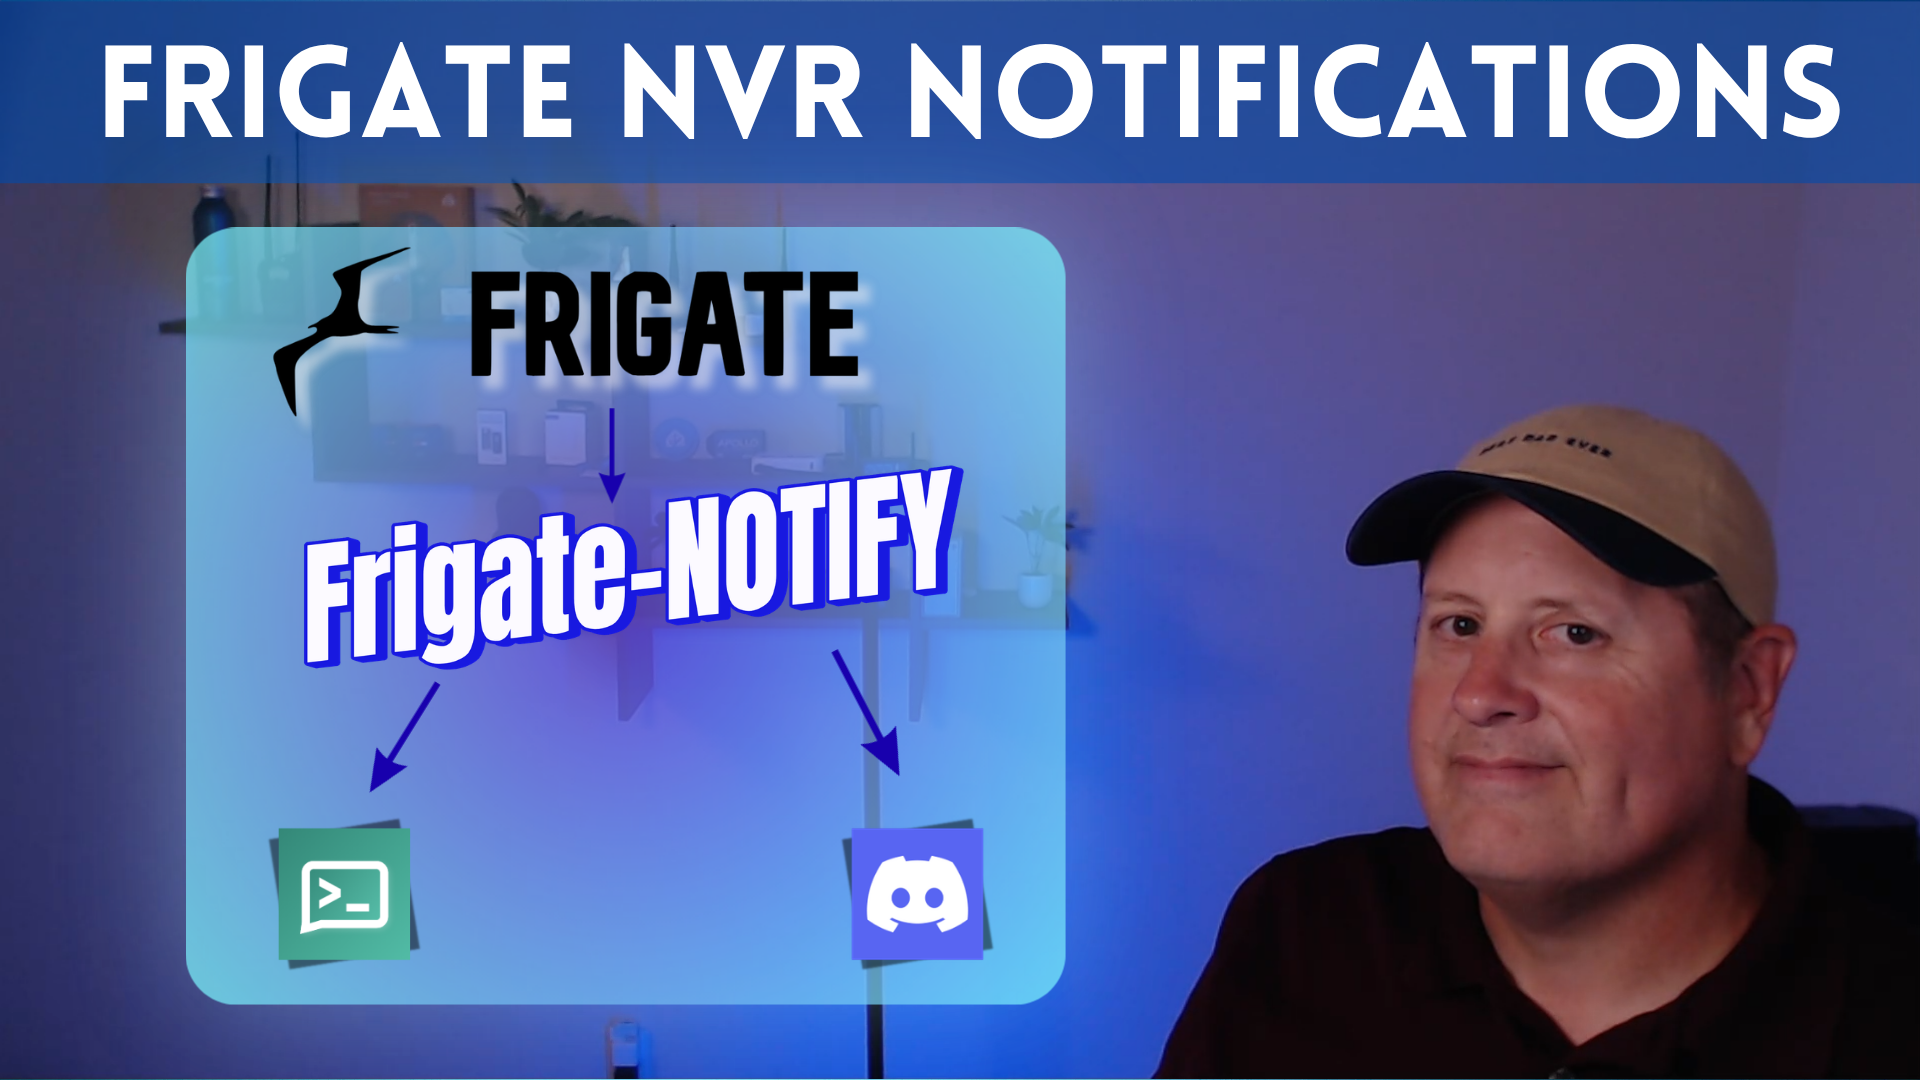
A New Look at Frigate Notifications
Easily add Frigate NVR notifications to any platform with Frigate Notify.
I have been using notifications for Frigate via Home Assistant for a long while now and they have been flawless. This presents two issues.
- What if you don't use Home Assistant?
- You rely on another device to proxy your alerts (assuming you don't use the Frigate Home Assistant app).
What inspired me to take a look at another option was a Reddit thread talking about something called frigate-notify. This further sent me down the rabbit hole into a notification system called ntfy. Let's get into how I am using these.
Be sure to watch my video on this topic here!
Frigate-notify can send notifications to a number of different platforms but I chose ntfy because that platform can also serve as a central notification hub for all my notifications such as those from Home Assistant and Uptime Kuma. In addition, ntfy is very easy to integrate into almost anything. Because both ntfy and frigate-notify have quite a few settings, I will focus on what I configured to make it work rather than going through everything. Bonus, I am also sending alerts to a private Discord channel on my Discord server.
Install and configure ntfy
While there are options to use cloud based ntfy for a price, I chose the self-hosted option to follow my theme of keeping local as much as possible. To do this, I installed ntfy from the UNRAID Apps page. I feel I cheated a bit here for the sake of time and because I have the means to do it this way. There are many different ways to install so just choose the method that is best for you.
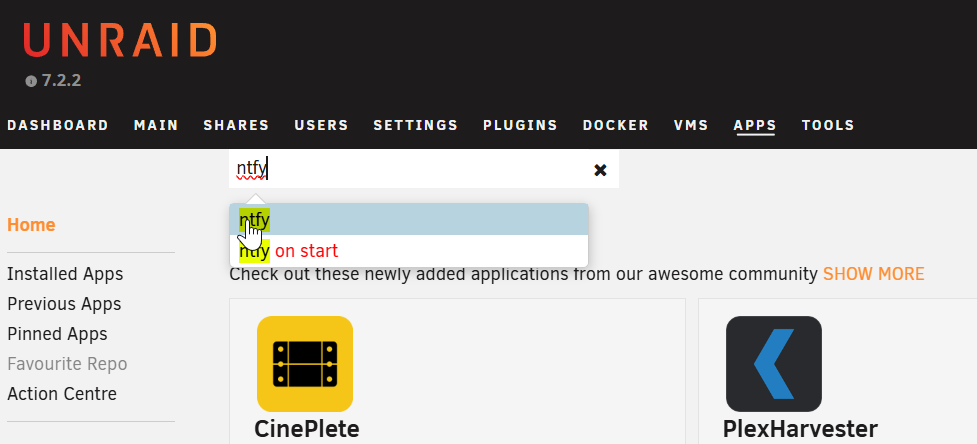
During the install, you will get the standard options screen that you see in many UNRAID installs. I had to change a few things. First, the default port was already in use so I changed to 8082, and I also provided a full URL that will be the base for the app.
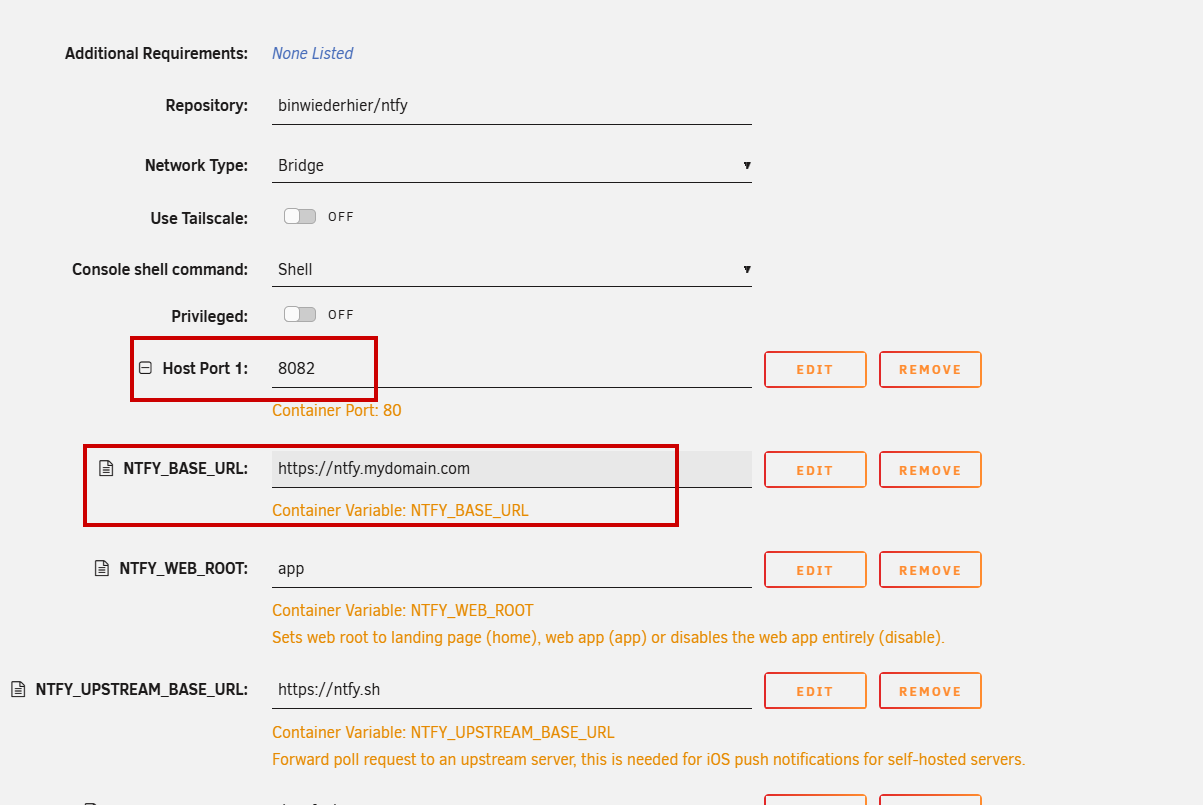
Out of the box, the AUTH_FILE and AUTH_DEFAULT_ACCESS are populated. According to the documentation, if there is anything in the AUTH_FILE setting, authentication is turned on and every subscription would require sending credentials. For my initial configuration, I removed the AUTH_FILE setting since this is all local. You will need to decide what level of security you want enabled, especially if you plan on doing anything publicly with this install.
There are other options on that page, but I left them at the default for now. Once everything is set, install ntfy.
If everything goes well, you should be able to go to the URL:PORT that you set up in whatever install method you chose and you will see a web frontend for ntfy.
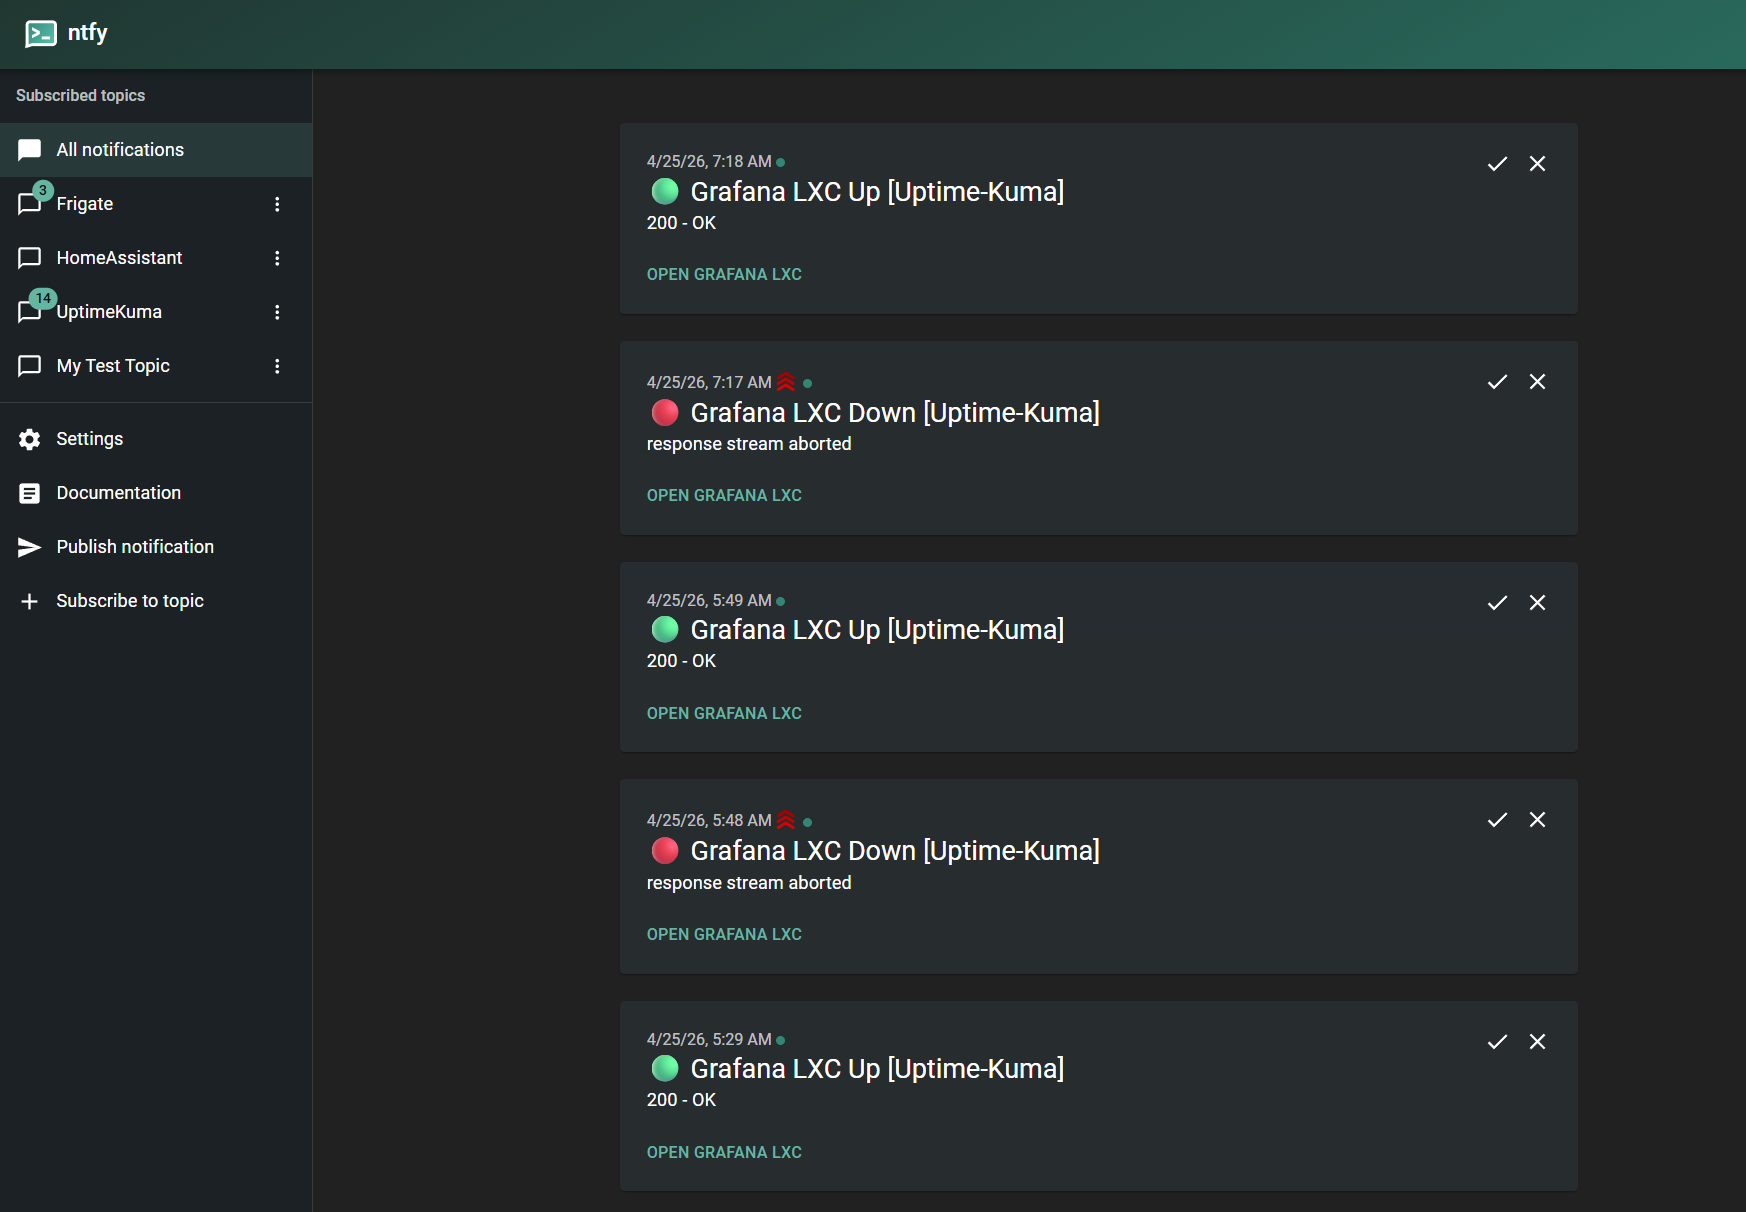
As I said before, ntfy is a one-stop shop for all your notifications and you can subscribe to as many topics as you want (up to system limits). For frigate-notify, I will subscribe to a topic and call it Frigate. There is mention in the docs of using obscure names to make it harder to guess. YMMV.
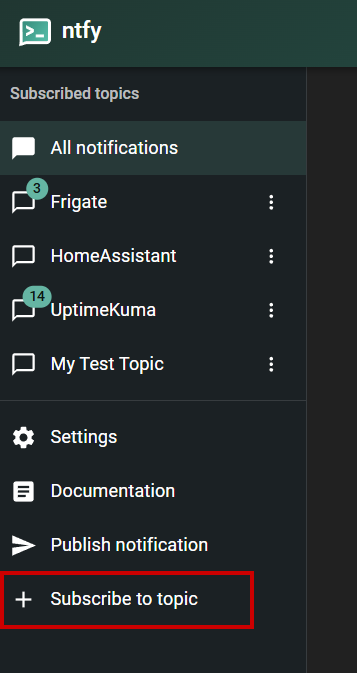
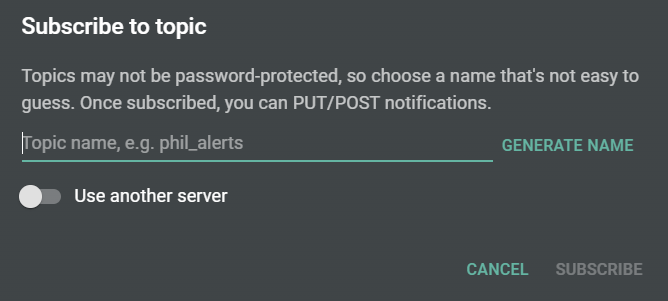
You will get a popup asking you to provide a topic name or you can click the Generate Name button to have it create a topic name for you. Once you have a name, click on Subscribe and ntfy will now be listening for events sent to that topic. You should see the topic name under Subscribed Topics on the left.
In the simplest terms, this is all you need in order to send messages to ntfy from Frigate. You can test by clicking into the new topic and typing something into the message window at the bottom and sending it.
I should also mention that there is a ntfy iOS and Android app available and would be required if you want notifications on your devices. See the website for more on this. I am using Android. If you install the app and subscribe to the topic you created, sending a test should show up there. What I won't get into here is the idiosyncracies of using iOS. Apparently, there are some issues getting alerts to Apple devices and you have to use PWA, which is basically a web app created from the web page on the device. I'll leave it up to you to work through those issues.
Install Frigate-Notify
The recommended method for installation is using docker. I will assume you have docker installed and running on your distro. I am running Debian Bookworm for this on my Proxmox server.
Installation is super simple and config is really not that hard either. There is some config file work here but don't be intimidated. Compared to other systems I have had to configure, this is child's play.
Start with the docker-compose.yml file. This is all I have in mine. You will notice that I have the REST API enabled. I use that to turn on/off notifications via Home Assistant. Make sure the config.yml file path is correct for your install.
services:
  frigate-notify:
    image: ghcr.io/0x2142/frigate-notify:latest
    # Uncomment below if REST API server is enabled
    ports:
      - "8000:8000"
    environment:
      - TZ=America/Chicago
    volumes:
      - /home/mostlychris/frigate-notify/config.yml:/app/config.yml
    restart: unless-stopped
Let's get on to the relevant config file entries. There is a full sample config file in the frigate-notify docs. I will show you the sections I modified.
First, you need to choose the mode. Either reviews or events. I have set the mode to reviews so that I only get notifications for the actual alerts and not for every event. You can also get notifications for detections as well, but that is set farther down in the alerts stanza. I also enabled the API on port 8000.
app:
  mode: reviews
  api:
    enabled: true
    port: 8000
Specify the location of your Frigate server. I tried using 127.0.0.1 since it is on the same host, but that didn't work so I specified the real IP address. There is also a public URL setting that will determine where the actionable clicks will go such as viewing videos, etc.
frigate:
  server: 172.31.10.6:5000
  ignoressl: true
  public_url: https://your.frigatedomain.com
  headers:
  startup_check:
    attempts:
    interval:
Since I am using MQTT with Frigate, that is the method I chose and is what I recommend. With MQTT, you get instant feedback on events vs webapi in which you set a check interval. Only one can be enabled and the other must be set to enable: false. If using MQTT, the topic_prefix must match what Frigate is sending to the broker. Also, but Frigate and Frigate-Notify must be talking to the same broker.
  webapi:
    enabled: false
    interval:

  mqtt:
    enabled: true
    server: 172.31.10.3
    port: 1883
    clientid:
    username: mqttuser
    password: mqttpass
    topic_prefix: frigate
For the general alerts settings, I only changed a few things from default. I set the title, set snap_crop to true, notify_once to true, and notify detections to true. You can read the docs here and tune this as you need.
alerts:
  general:
    title: Frigate Alert
    timeformat:
    nosnap:
    snap_bbox:
    snap_timestamp:
    snap_crop: true
    snap_hires:
    max_snap_retry:
    notify_once: true
    notify_detections: true
    recheck_delay:
    audio_only:
The last piece of the general settings has to do with what zones and labels you want. It's a form of filtering events so you only get what you want. Out of the box, there are some placeholders in these settings and they likely won't match anything in your frigate setup. That means no alerts will work until you adjust these. In my case, I set the street to be blocked from alerts, set the unzoned to allow, and set the labels to only allow person and car objects. I removed the out of the box sublabels.
As I type this, I realize that I probably want to remove the street block and instead set allowed zones so I get alerts when an object enters a zone. You can play around with these settings to get them just right for your use case.
  zones:
    unzoned: allow
    allow:
    block:
     - street

  labels:
    min_score:
    allow:
     - person
     - car
    block:

  sublabels:
    allow:
    block:
That covers the general settings, which are very simple. It will take you longer to read my explanations here than actually configuring this file.
Let's move on to the notifications setup. From this point in the file until almost the end, it is all about the different notification channels you can set up. As I mentioned earlier, I am using ntfy, but also thought I'd throw in a Discord notification as well. I will show you the relevant sections.
For Discord, I went into my Discord server and created a private channel. In that channel, under Integrations, I created a webhook.
Once I had a webhook, I added it to the Discord configuration stanza in the config file. You can even use a template to customize the look. More in the docs.
  discord:
    enabled: true
    webhook: https://discord.com/api/webhooks/mywebhooooooook
    disable_embed:
    template:
Simple! Now let's add the ntfy config. Once again, you can use a template here if you want.
  ntfy:
    enabled: true
    server: https://your.notify.server
    topic: Frigate
    ignoressl: false
    headers:
    template:
That's it. I didn't touch anything else in that file. There is a monitor section at the end of the file that, if enabled, will send I'm alive packets to specific monitoring services. I use Uptime Kuma so I may experiment with that later.
Once you have your config file set up, it's time to start up the container. I use the following command while in the same directory as the docker-compose.yml file. Again, make sure the path to your config file is set properly in the compose file.
docker compose up
If this is your first run, it should pull down the files and then start up. A successful startup should look something like this.
# docker compose up
Attaching to frigate-notify-1
frigate-notify-1  | 2026/04/25 09:24:31 -0500 INF Frigate Notify - v0.5.4
frigate-notify-1  | 2026/04/25 09:24:31 -0500 INF Starting...
frigate-notify-1  | 2026/04/25 09:24:31 -0500 INF Config loaded
frigate-notify-1  | 2026/04/25 09:24:31 -0500 INF Successfully connected to http://172.31.10.6:5000
frigate-notify-1  | 2026/04/25 09:24:31 -0500 INF Config file validated!
frigate-notify-1  | 2026/04/25 09:24:31 -0500 INF API server ready on :8000
frigate-notify-1  | 2026/04/25 09:24:31 -0500 INF App ready!
frigate-notify-1  | 2026/04/25 09:24:31 -0500 INF Connected to MQTT.
frigate-notify-1  | 2026/04/25 09:24:31 -0500 INF Subscribed to MQTT topic: frigate/reviews
As events arrive from Frigate, they will show up in the output. Here is an example of an event that did not generate an alert because of the filtering I have in place (was on the street and the street is in the zone block list).
frigate-notify-1  | 2026/04/25 09:25:39 -0500 INF Processing review... audio= camera=driveway num_detections=1 objects=person review_id=1777127138.939037-pw5sr7 severity=detection zones=street
frigate-notify-1  | 2026/04/25 09:25:39 -0500 INF Event dropped - Zone block list. event_id=1777127130.740872-7sy5y4 zones=street
frigate-notify-1  | 2026/04/25 09:25:39 -0500 INF Review dropped - No events eligible for notification review_id=1777127138.939037-pw5sr7
frigate-notify-1  | 2026/04/25 09:26:44 -0500 INF Processing review... audio= camera=driveway num_detections=1 objects=car review_id=1777127203.180062-kzaj3q severity=detection zones=street
frigate-notify-1  | 2026/04/25 09:26:44 -0500 INF Event dropped - Zone block list. event_id=1777127202.731974-4jre9h zones=street
frigate-notify-1  | 2026/04/25 09:26:44 -0500 INF Review dropped - No events eligible for notification review_id=1777127203.180062-kzaj3q
Controlling Notifications Via Home Assistant
If you DO use Home Assistant and you want to control your alerts from your favorite dashboard or automation, things become a little complicated.
I have experimented with a couple of ways to handle this. The first is to toggle all alerts from frigate-notify with a button on my dashboard.
This method utilizes the frigate-notify API that was enabled in my frigate-notify config. It is composed of a few items in Home Assistant. First, there is a script that toggles the state and at the same time gets the current state so it is reflected on the button.
toggle_and_refresh_notif_state:
  alias: "Toggle and Refresh Notif State"
  sequence:
    - action: switch.toggle
      target:
        entity_id: switch.notifications
    - action: homeassistant.update_entity
      target:
        entity_id: sensor.notif_state
This also requires a rest_command and rest script.
  set_notif_state:
    url: "http://172.31.10.6:8000/api/v1/notif_state"
    method: POST
    headers:
      Accept: "application/json, application/problem+json"
      Content-Type: "application/json"
    payload: '{"enabled": {{ enabled | lower }}}'


rest:
  - resource: "http://172.31.10.6:8000/api/v1/notif_state"
    headers:
      Accept: "application/json, application/problem+json"
    scan_interval: 30
    sensor:
      - name: "Notif State"
        value_template: "{{ value_json.enabled }}"
There is also a template to create the switch.
- switch:
    - name: "Notifications"
      state: "{{ states('sensor.notif_state') == 'True' }}"
      turn_on:
        - action: rest_command.set_notif_state
          data:
            enabled: true
      turn_off:
        - action: rest_command.set_notif_state
          data:
            enabled: false
All this combined adds the ability to toggle ALL frigate-notify alerts and get a near instant feedback response. While workable, it doesn't solve the issue of being able to silence alerts on individual cameras or camera groups.
In the image below the gray bars are automation toggles that are using Home Assistant blueprints for Frigate notifications. The green bars are detection settings for each camera via MQTT. The idea is to decouple Frigate alerts from Home Assistant but still be able to control them easily from a dashboard. I know that will make some of you crazy. I want my cake and eat it too. What this DOES do, is keep you from having to install any frigate or frigate proxy stuff in Home Assistant, HA is just a control front-end for the alerts.

As you can see, there is a lot of stuff to make this one thing work and I am not satisfied with it. I am still looking for other options. Here are some things I am considering.
- Use the ntfy app built-in mute function and just mute alerts for a period
- Disable detections per camera via MQTT calls to Frigate. I have this implemented now but the drawback is it doesn't just suppress alerts, it also stops detections.
- The other option I am considering is to use multiple ntfy profiles in frigate-notify config that I can programmatically change via API calls. Doing something like this will allow changing the profiles from within Home Assistant or any other tool that can make API calls.
Remember to watch the video!